Deleting items from eCom is the reverse action of publishing.
NOTE: Deleting eCom data will permanently remove any information stored in the eCom product. Read Preventing eCom data loss to learn how to backup your eCom data before you delete it.
Delete items from eCom by:
- Deleting a single item from eCom
- Deleting items from eCom using Quick Edit Items
- Importing to delete items from eCom in bulk
Deleting a single item from eCom
- From the main menu, click Inventory > Item Search.

- Click the item description of an item you want to publish to eCom.
- From left menu section Details, click Delete from eCom.
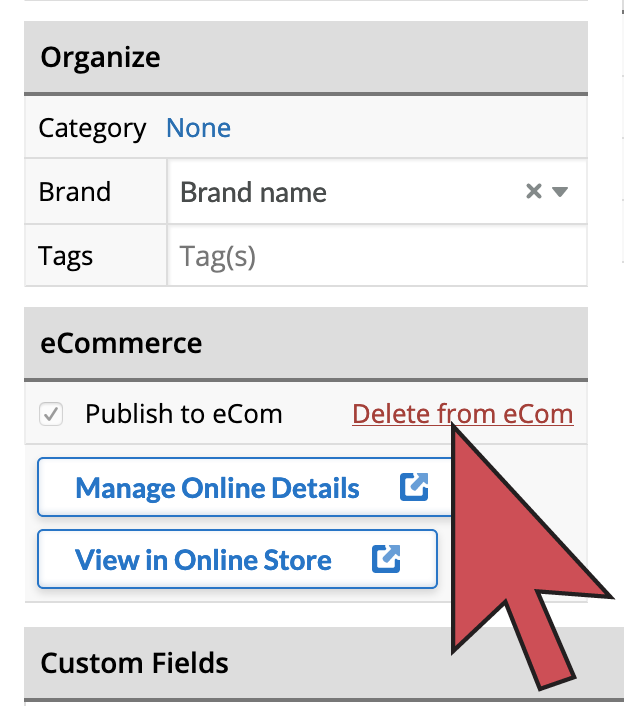
- Read the warning message and click I understand the consequences. Delete from eCom.
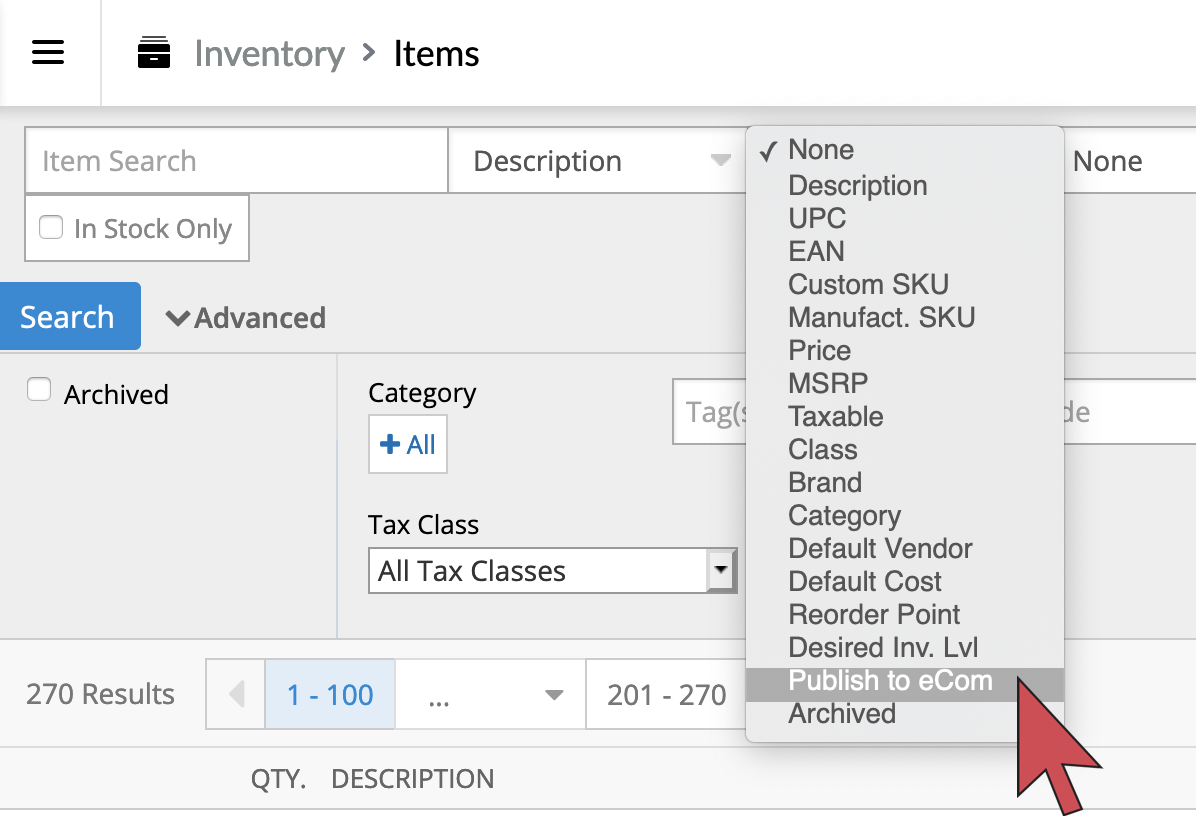
Deleting items from eCom using Quick Edit Items
- From the main menu, click Inventory > Quick Edit Items.

- From one of the drop-downs, select Publish to eCom and click the blue Search button.
- From the PUBLISH TO ECOM column, click your item's trash bin icon to delete it from your eCom store. You can also click the column header to group your published and unpublished items together.
- Read the warning message and click I understand the consequences. Delete from eCom.
Importing to delete items from eCom in bulk
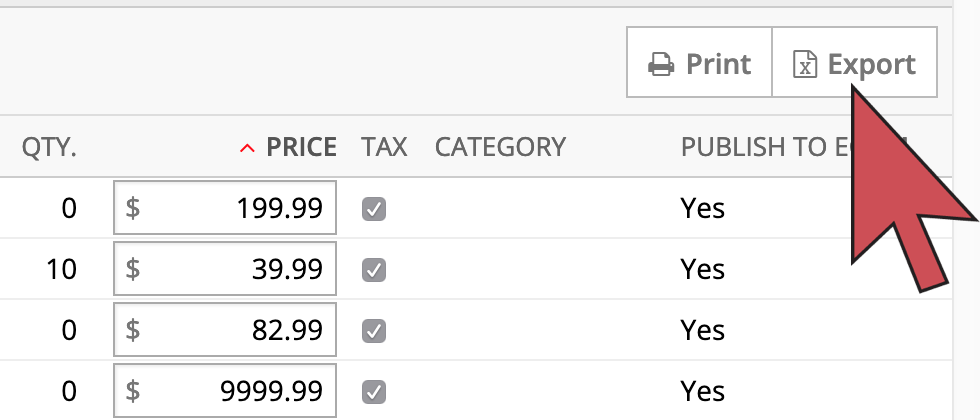
- From the main menu, click Inventory > Item Search.
- Make the products to be deleted visible in the results, using filters if required. Then at the top of the results on the right-hand side of the screen, click Export.
- Save your file in an easy to find location on your computer.
- Open the saved file in your preferred spreadsheet software.
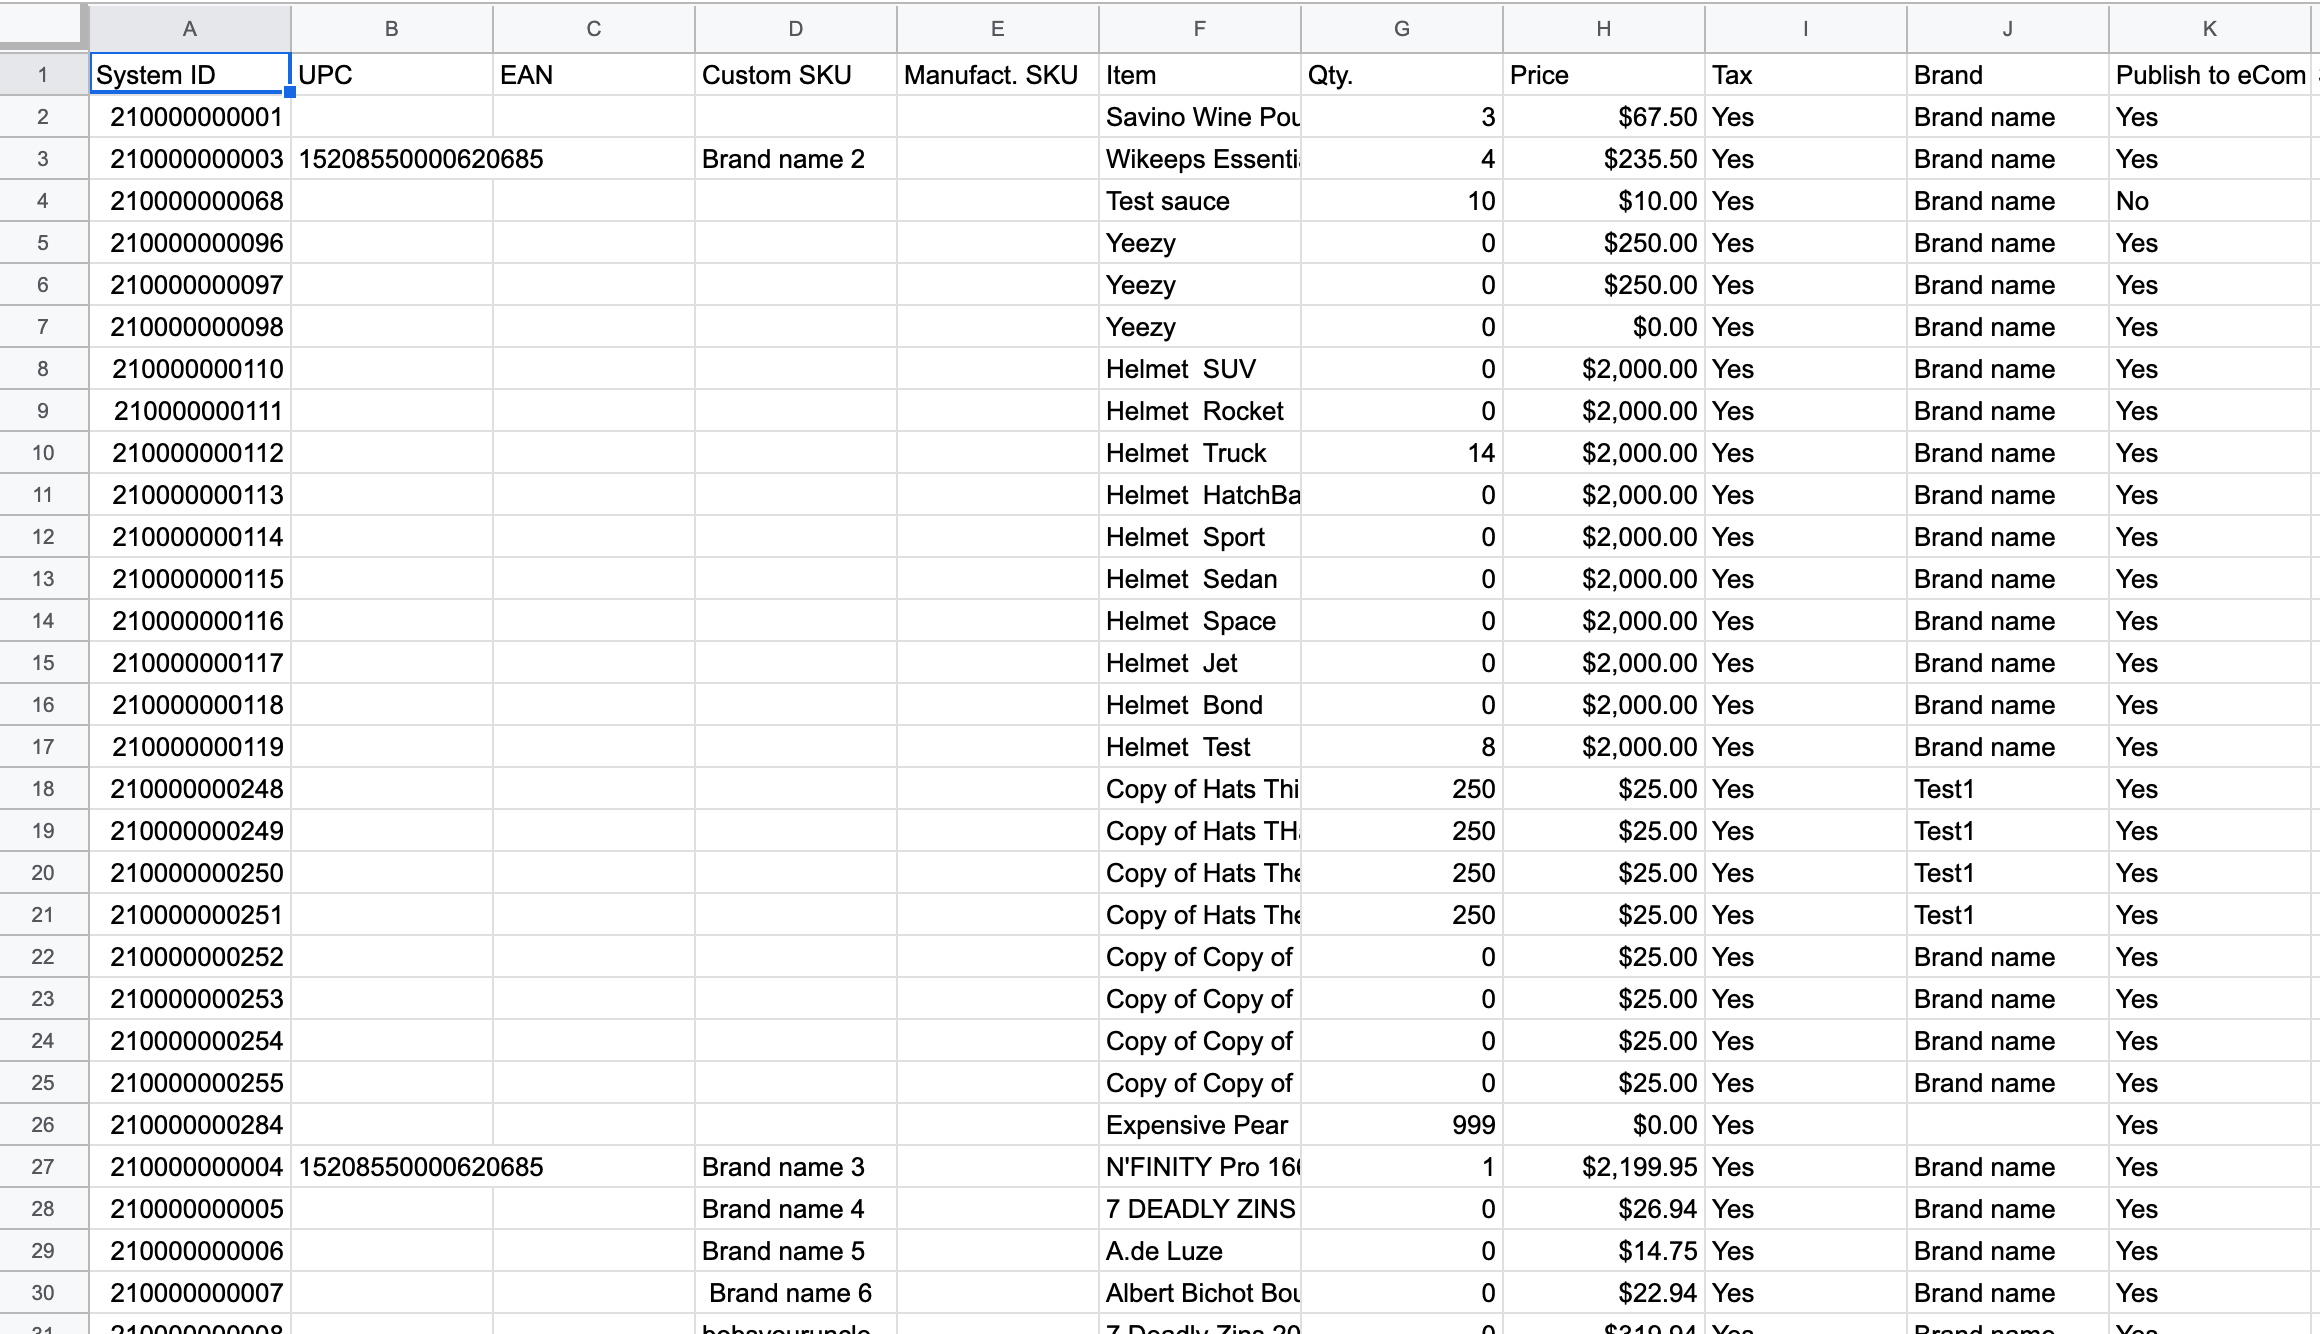
- Highlight and delete all unnecessary products. This prevents you from deleting products accidentally.
- Highlight by selecting the row number(s) on the left-hand side of the spreadsheet.
- Delete by right clicking and selecting Delete row.
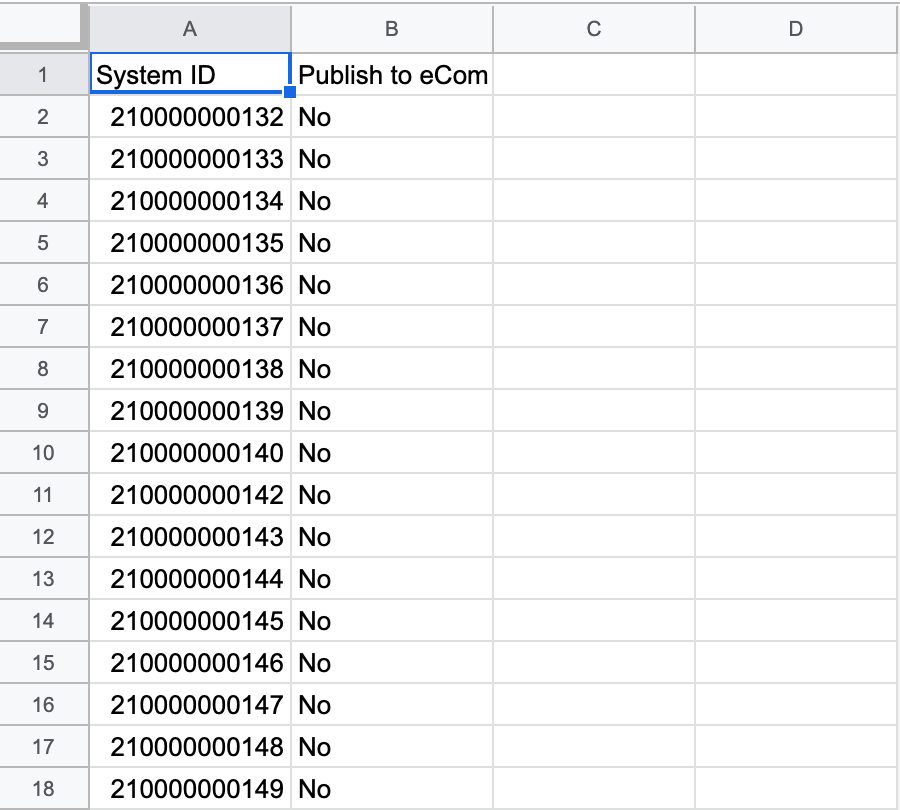
- Locate the Publish to eCom column and copy/paste No for every product.
- Remove all unnecessary columns. This ensures only the required product details are affected by the import.
To delete products from eCom by import, the only necessary columns are:
- System ID
- Publish to eCom
To remove the unnecessary columns:
- Highlight by clicking the column letter(s) at the top of the spreadsheet.
- Delete by right clicking and selecting Delete column.
- Save the spreadsheet in an easy to find location.
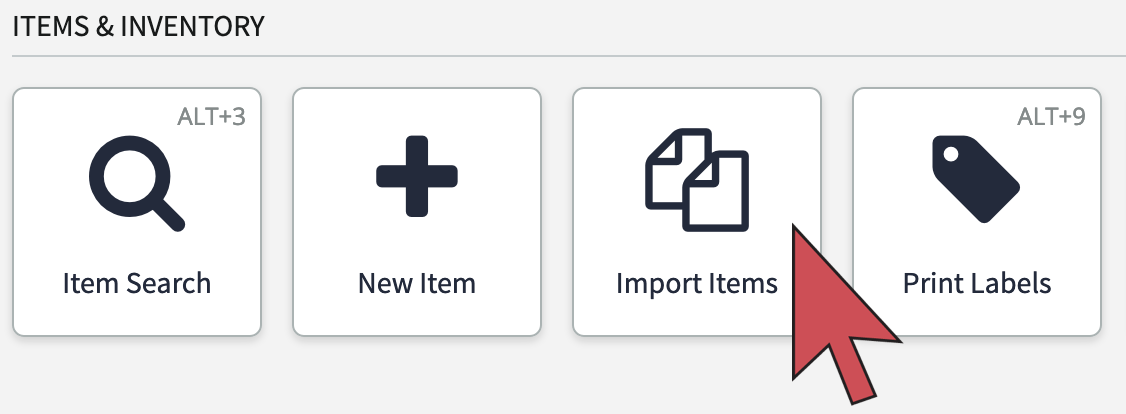
- From the main menu of Lightspeed Retail, click Inventory > Import Items.
- Click Close if a popup window appears.
- Click New Import.
- Click Browse, locate and Open the spreadsheet.
- For Behaviour, choose Only update existing items.
- Ensure Match on field is set to System ID.
- Click Continue.
- Review the import stats and ensure the number of products your importing equals the number of Updated items. Also, make sure the only field with content is the Publish to eCom field says No.

Once verified, click Import Items. - When the import is complete, test to ensure all intended products have been deleted from eCom.