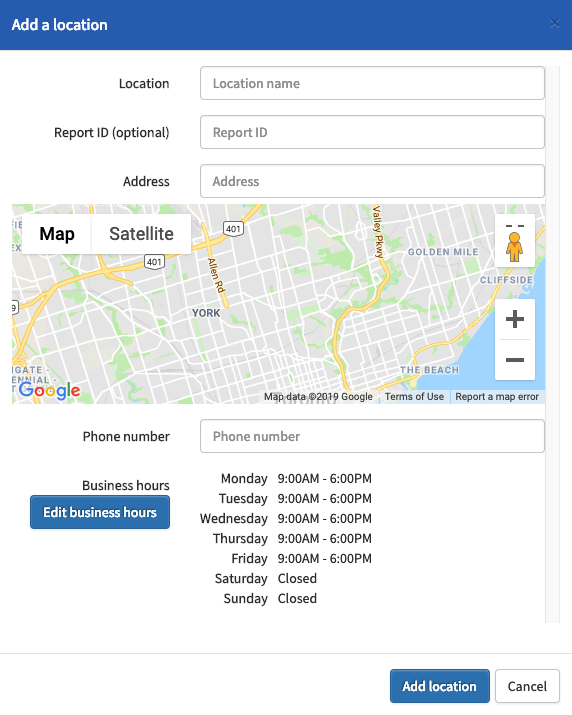
If your Lightspeed Retail account is managing more than one shop, you'll want Lightspeed Loyalty to be able to distinguish between transactions made in different shops. You can create Locations in Lightspeed Loyalty and tie them to your Lightspeed Retail shops in order to accomplish exactly that.
To begin, navigate to Locations > Manage Locations.

You'll see a list of your existing locations and can edit, temporarily disable, or permanently delete them:
- To edit a location, click the
 button.
 - To temporarily enable or disable a location, toggle the
 /
/  switch.
 - To permanently delete a location, click the
 button.
To add a new location:
- Click Add Location.

- Enter the Location Name.
- Optionally, enter the Report ID. This ID will appear next to each transaction made at this location in the Reports section.
- Enter the location's Address.
- Enter the location's Phone number.
- Adjust the location's Business Hours by clicking on Edit business hours.
- Click Add location.
Note that you are not able to add an Integration ID until the location has been added in Loyalty, however the Integration ID is necessary for Loyalty to identify which of your shops a transaction took place in. To add the Integration ID, double-click the space on the table reserved for it.

Enter that shop's Lightspeed Retail shopID and press Enter on your keyboard.
How to Obtain your Lightspeed Retail shopID
- Log in to Lightspeed Retail.
- Navigate to Settings > Locations > select Customize next to the desired shop.
- Examine the URL for this shop's details.

- Find the segment of the URL that says "id=X."
- Your shopID for this location is X.
In the above example, the shopID for "Gameporium" is 1.