One of the most powerful benefits of Lightspeed Loyalty is the ability to communicate directly with your customers through our marketing tools. The SMS Marketing module will allow you to reach your customers with short, immediate text messages, but you may also want to send longer messages to your customers. With the Email Marketing module, you can compose simple, text-based emails or use templates to include images, web links, and attach one-time rewards or free points.
Send basic email
When all you need is a simple body of text that's too long for an SMS, you can send a Plain Email to your customers. To do so:
- Navigate to Email marketing > Send basic email.
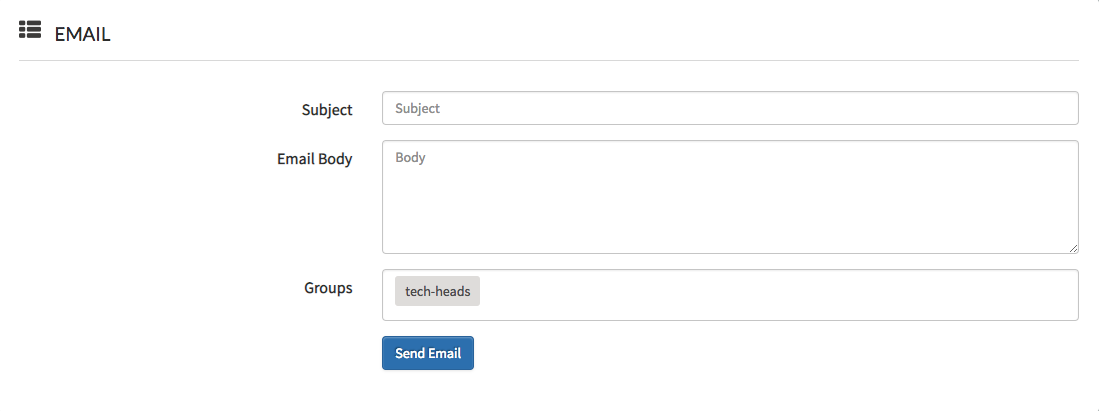
- Enter the desired Subject for this email.
- Compose your message in the Email Body field.
- Enter the names of the Groups you want to send this email to. If left blank, the email will be sent to all of your customers.
You can enter certain variables into the body of your email to have Lightspeed Loyalty pull a customer's specific information from their profile. For example, Dear %full_name%, will replace the variable %full_name% with the first and last name in the customer's profile. The variables you can use are:
- %full_name%
- %first_name%
- %last_name%
When your message is ready, click Send Email.
Send template email
If you want to send a message that's a little more eye-catching than plain text, you'll want to send a Templated Email. By selecting one of our built-in templates or by designing your own, you can create an email that reflects your business's aesthetic. You can also attach one-time rewards or free Loyalty points to the email to entice your customers to visit you!
Templates
To use one of our pre-made templates or to create your own:
- Navigate to Email marketing > Send template email.
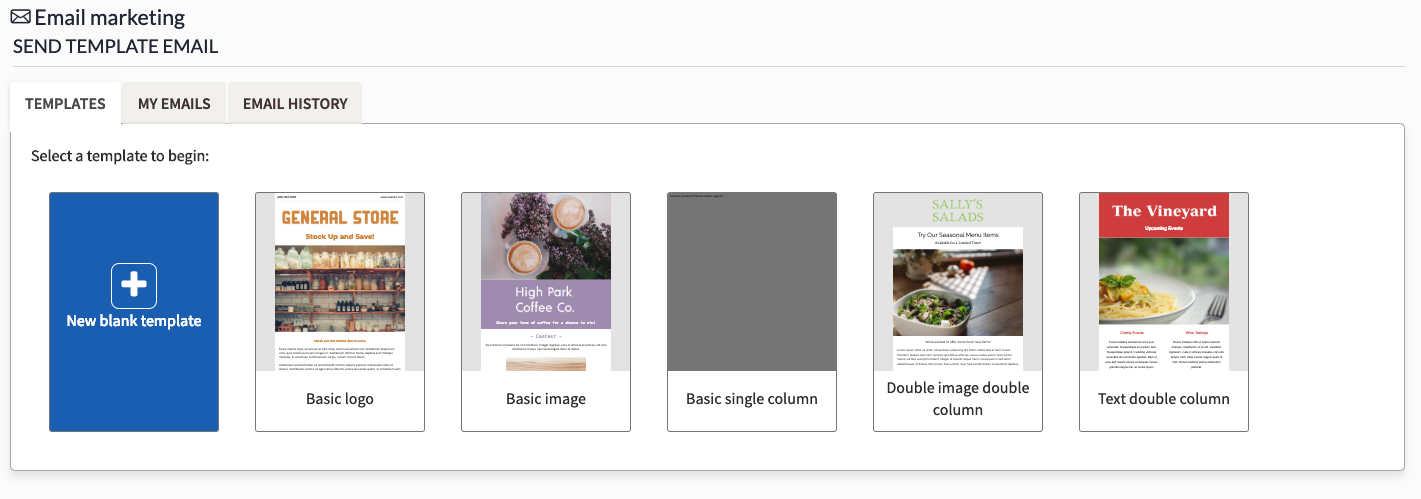
- Click on the desired pre-made template or click New blank template to design your own.
- Enter a name for this email. You will be able to view this email in your history or resend it by this name in the future.
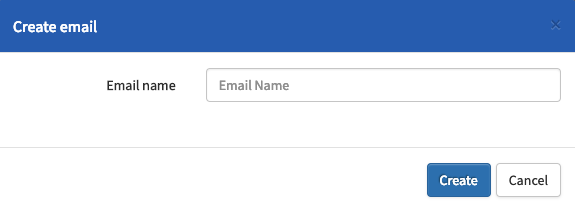
- Click Create.
- Enter the desired Subject line and the Groups you want to send this email to. If you do not specify any Groups, the email will go to all of your customers.
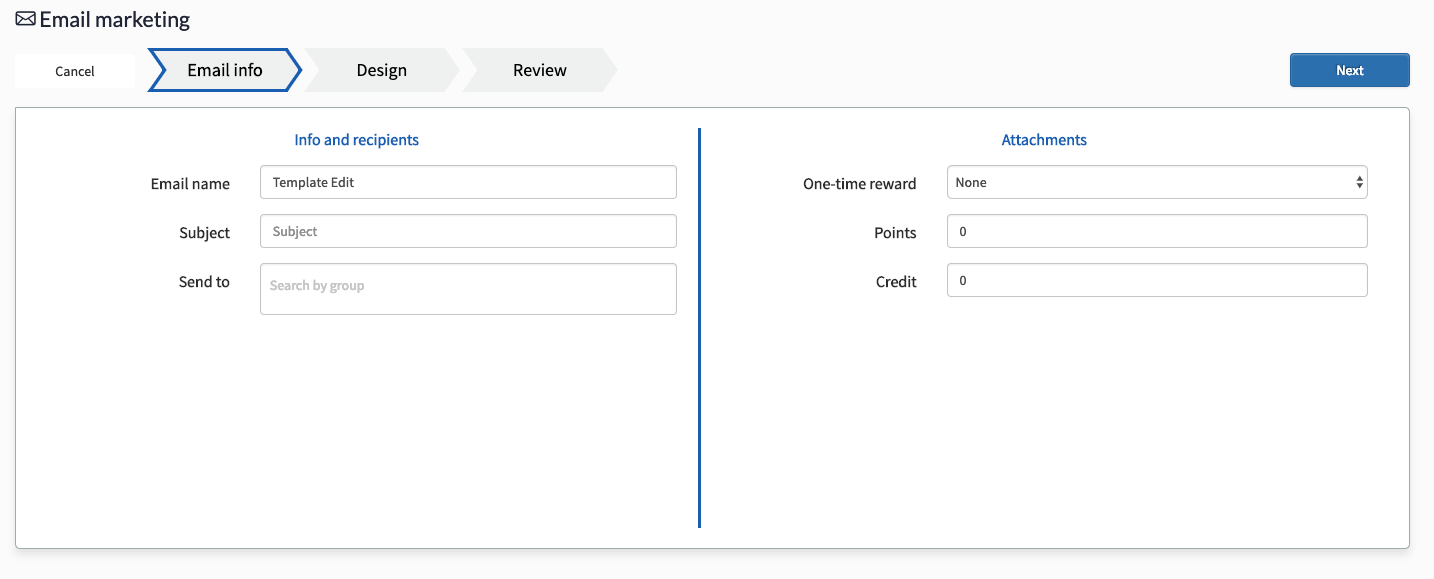
- Optionally, you can attach one-time rewards or free Loyalty points to the email by selecting the desired reward from the drop down list or entering the number of points to be awarded. The attached reward or points will be added to the Loyalty account of every customer who receives the email.
- Click Next.
- You can customize the appearance of your email.
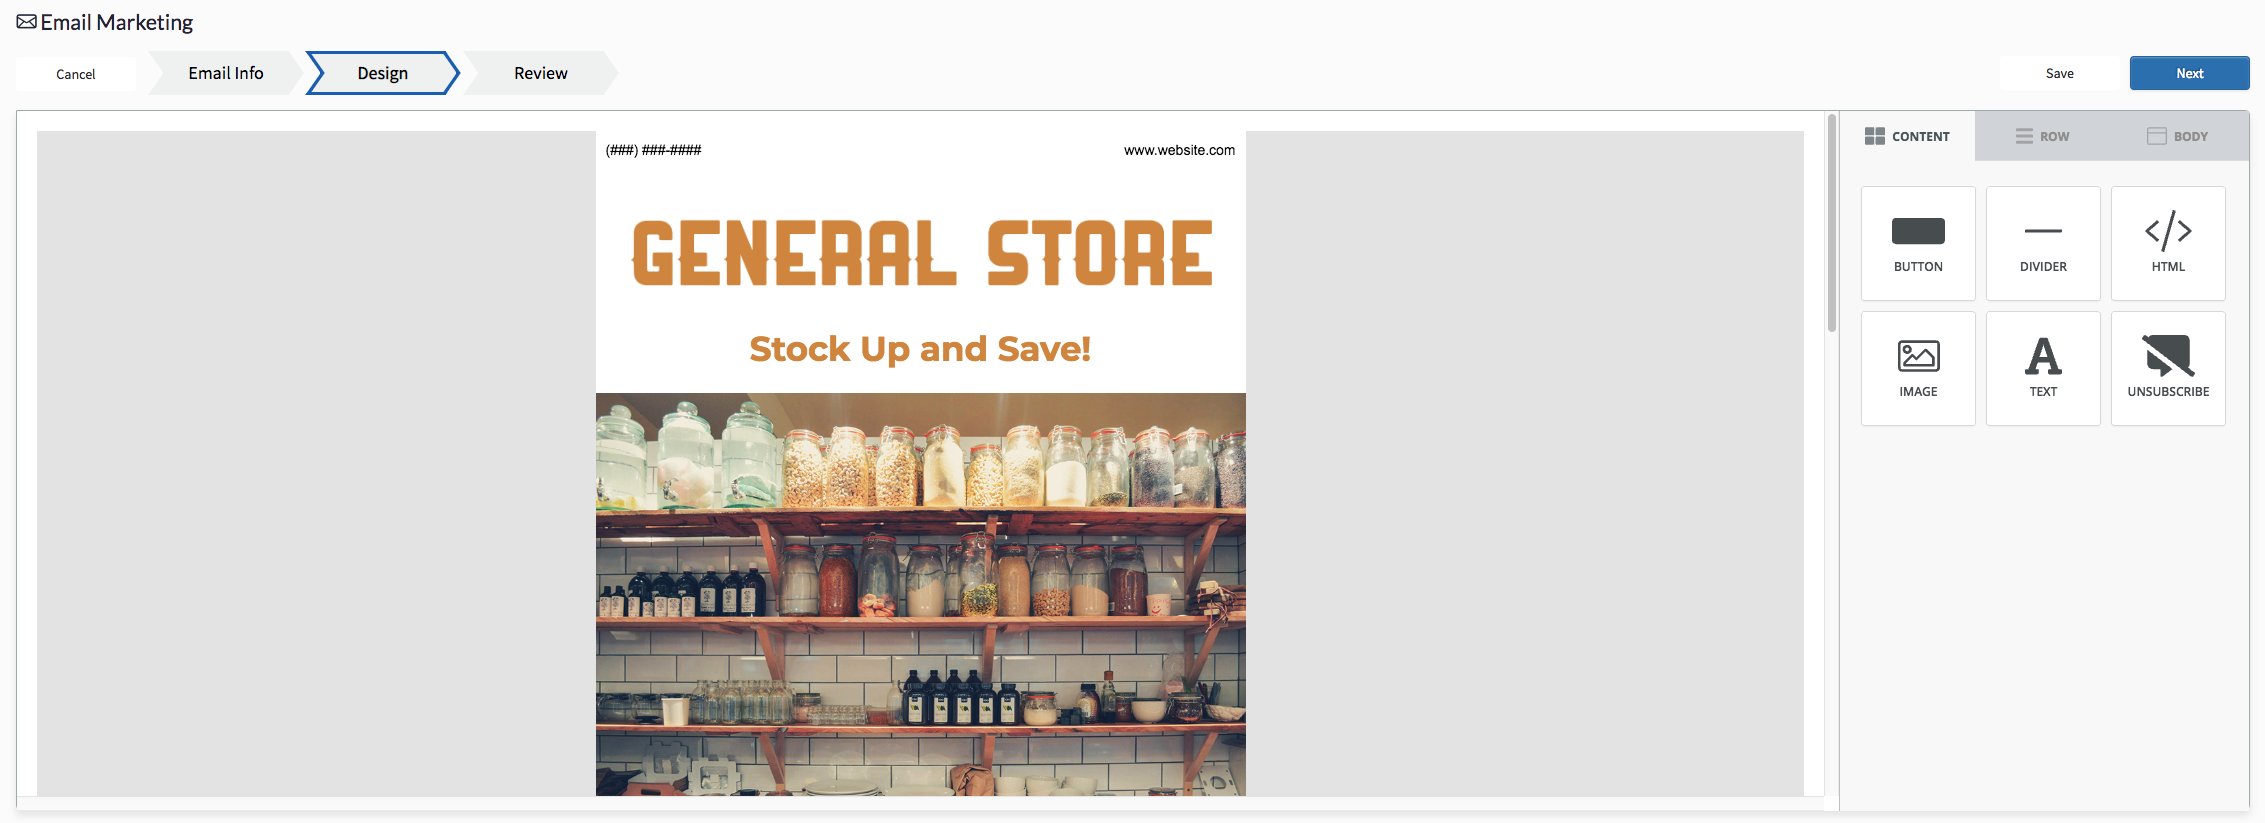
For more information on how, see the section on Designing your Email at the end of this article. - Click Next.
- Review the appearance, subject line, recipients, and attachments for this email.
- If you're ready to send the email, click Send.
My Emails
Once you've created a new template or customized an existing one, you can click on My Emails to view a list of the templates you've used in the past.
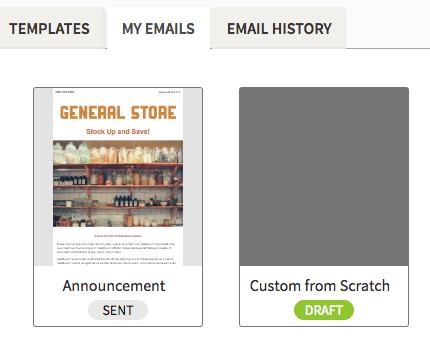
You'll be able to quickly see which templates are still in-progress (drafts) and which have already been sent. Hovering over a template will show you several options for interacting with that template.
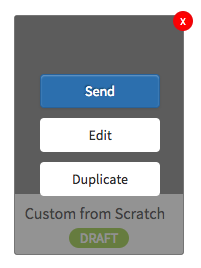
You can:
- Send it as is.
- Edit the template further.
- Create a Duplicate of the template (useful for starting with an email that has already been sent and updating it).
- Delete the template by clicking the red X.
Email History
By clicking on Email History, you'll be able to see a log of the emails you've sent to your customers in the past. You'll find useful information like which groups the email was sent to, how many emails were sent, and what percentage of those emails were opened.
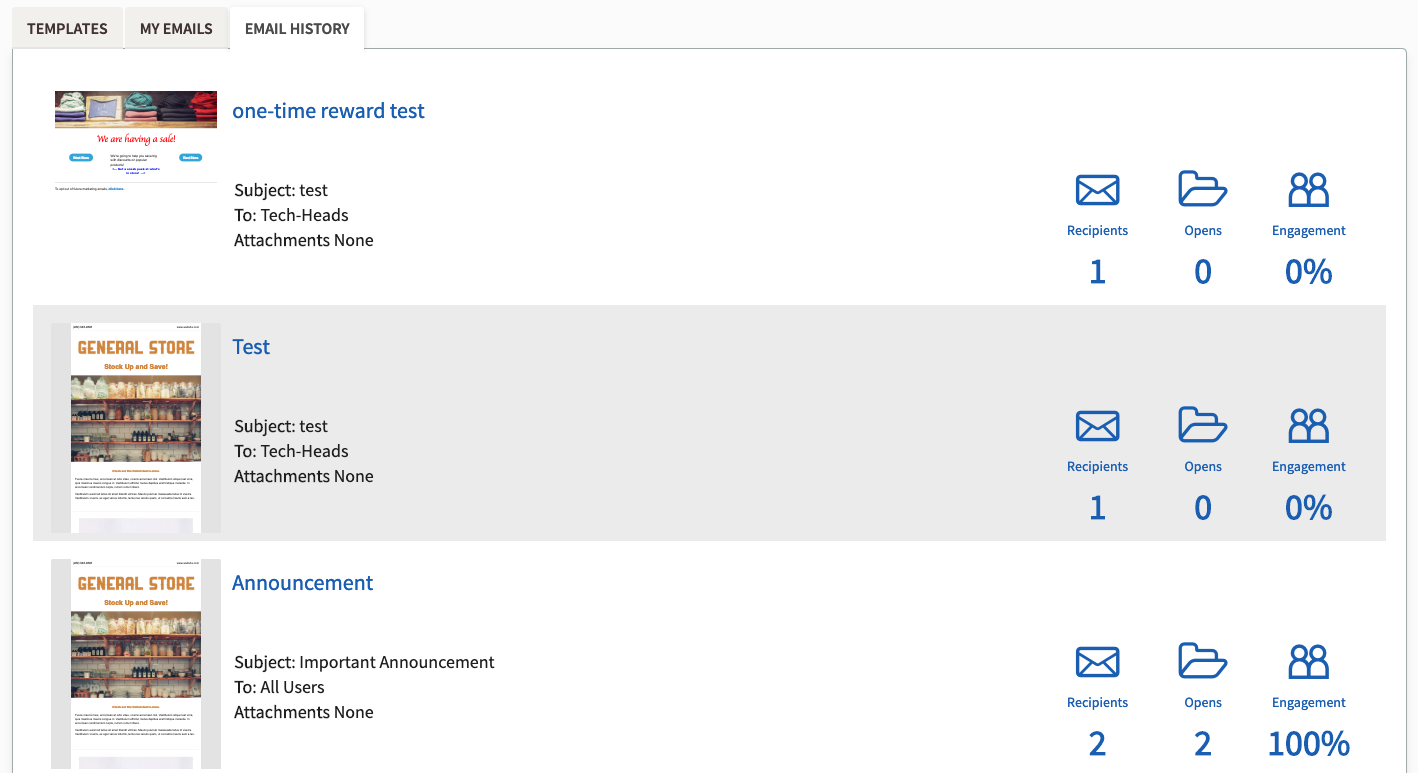
By comparing the Engagement of your previously sent emails (the percentage of emails sent that were opened), you can learn what kind of content resonates more with your customer-base and adjust your future emails accordingly.
Note that whether you specify certain groups of recipients or send the email to all of your customers, Loyalty will automatically remove customers who do not have an email address in their profile, as well as customers who have opted out of email marketing. The number of recipients recorded in the email history represents the net number of recipients after these customers have been removed.
Designing your Email
Lightspeed Loyalty's simple and flexible design system will allow you to quickly craft professional-looking marketing emails within minutes. As you drag the elements you want to include in your email onto your template, you'll dock them to the elements that are already there. By building your email from these interlocking blocks, you're able to easily create a symmetric, centered, and aligned visual without special training in graphic design.
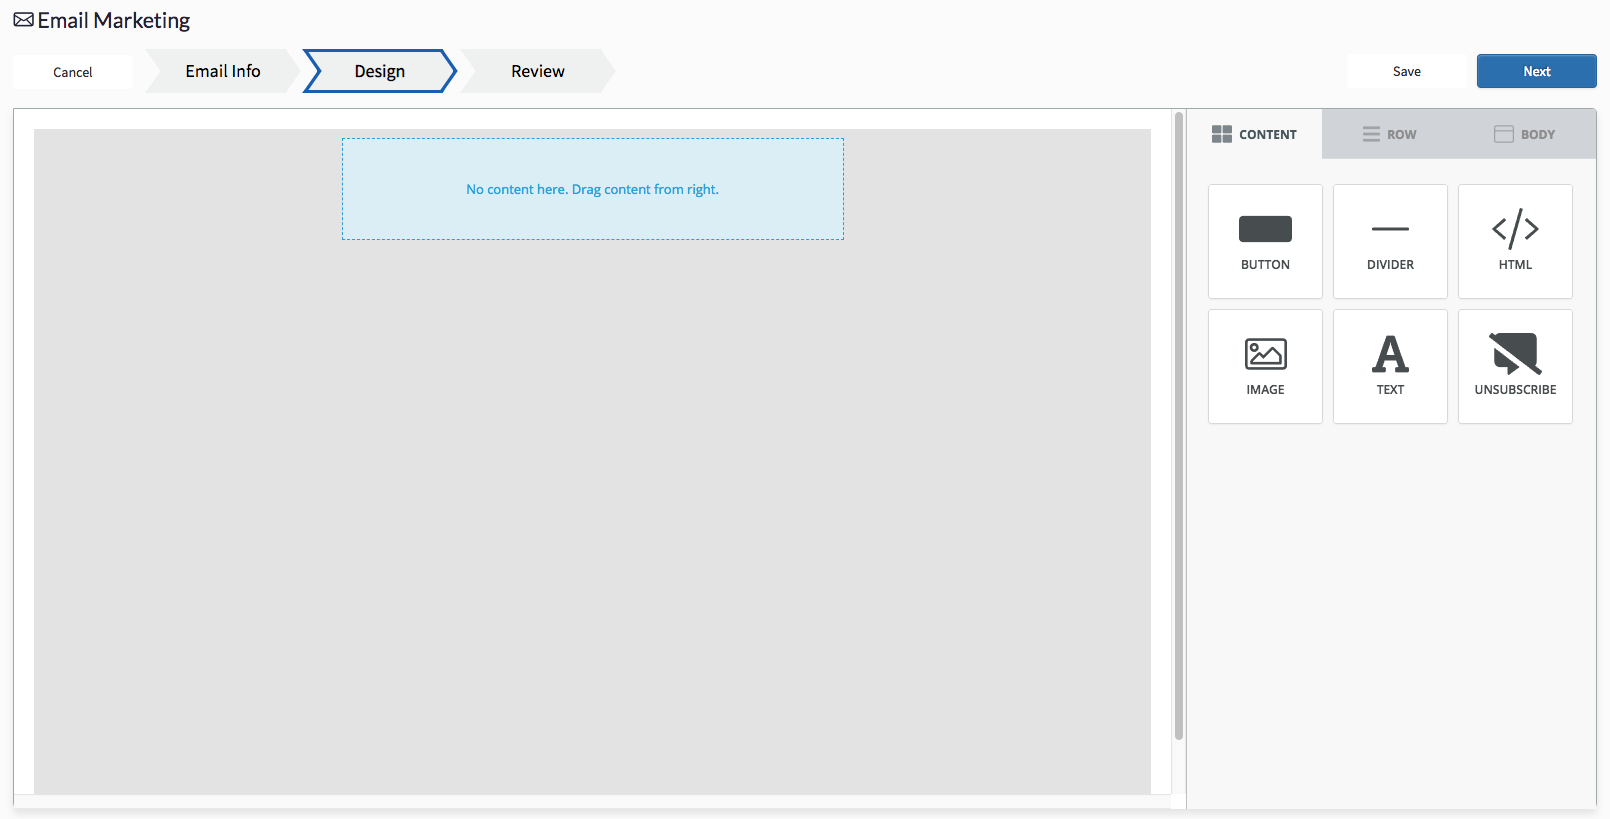
There are five elements which are the building blocks of your email template:
- Button: a clickable button that will open a URL.
- Divider: a simple horizontal line to divide sections of your email.
- HTML: a text box in which to put HTML code, should you want to design something yourself (requires knowledge of HTML coding).
- Image: can be a picture uploaded from your computer or hosted on the internet.
- Text: a block of text which can be formatted.
In addition to these, an unsubscribe link to opt out of future email marketing will automatically be appended to the end of all email templates.
Your template will be constructed by dragging these elements from the list on the right to the template on the left and docking them to previously-placed elements (or the top of the template). Once placed, each element can be further customized to your liking by clicking on it and editing its parameters.
For example, let's build a simple email template to announce a sale in the store. We want the email to be visually appealing, so we'll begin by adding a banner image to the top of the template. To do so:
- Click and drag the Image element to the top of the template.
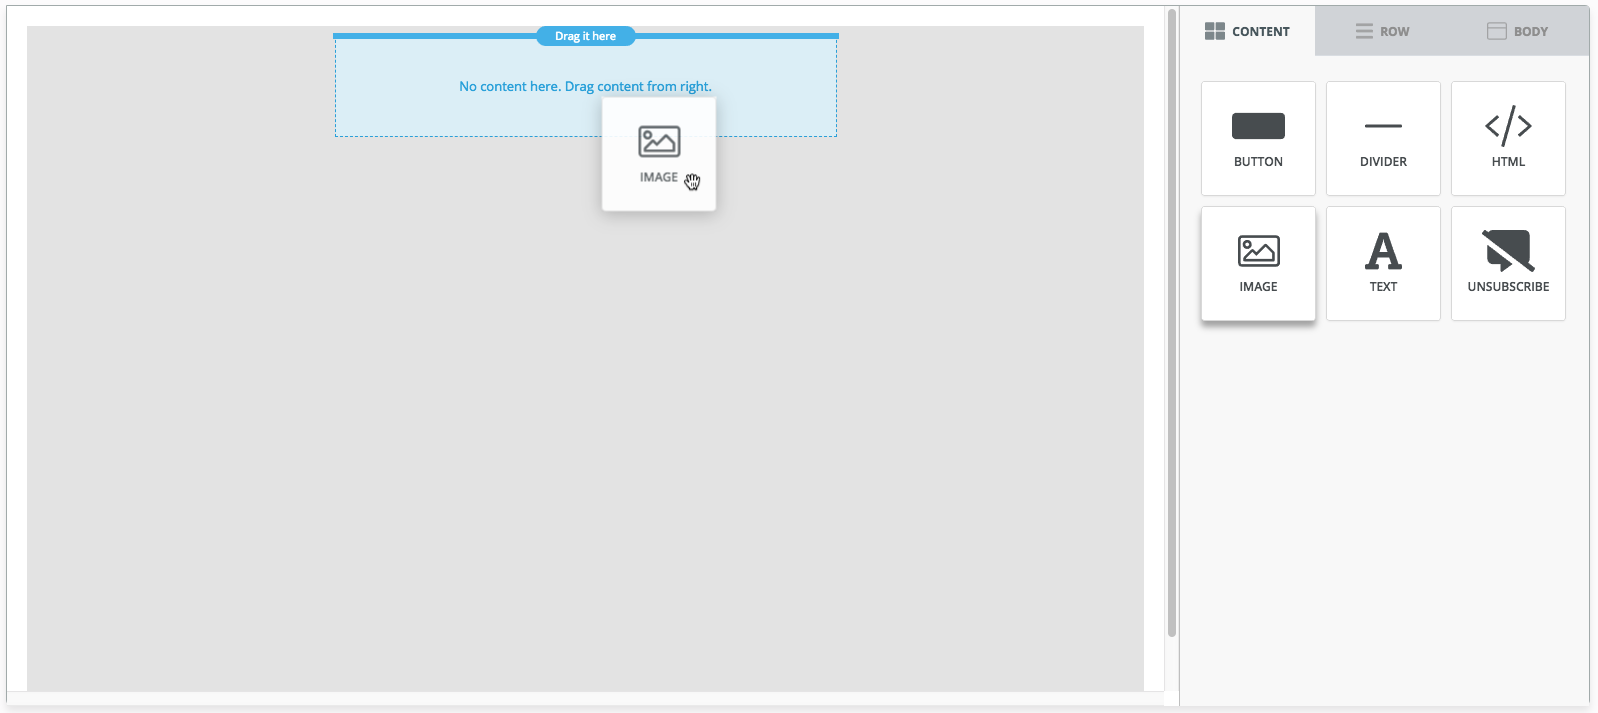
- Click on the grey IMAGE box to bring up its customization options on the right.
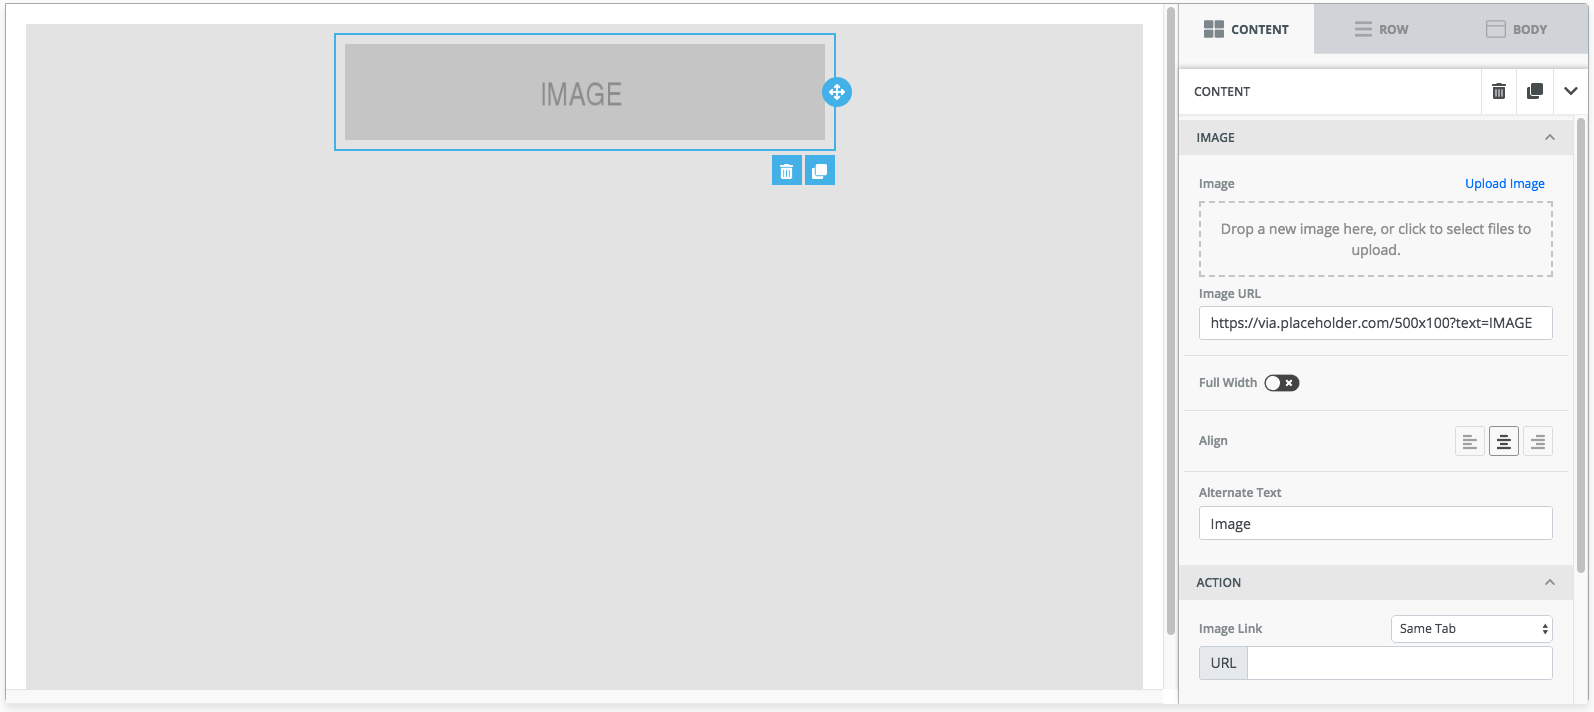
- Click Upload image and select the file to upload from your computer, or enter the URL of a web-hosted image you'd like to use.
- Optionally, you can:
- Set the image to be the Full Width of the email.
- Align the image to the left, right, or center.
- Enter the text that appears behind the image (if it is transparent).
- Enter a URL to be opened if the image is clicked on (you can set this URL to open in the same tab or a new tab).
- Set the margins that will separate this image from the other elements by adjusting the Container Padding.
- Click the Content tab to return to the list of elements.
Once we have our banner image at the top of our email, let's add some text below it:
- Click and drag the Text element and drop it just below the image we added. Note that the designer will prompt you for where you'd like to dock this element.
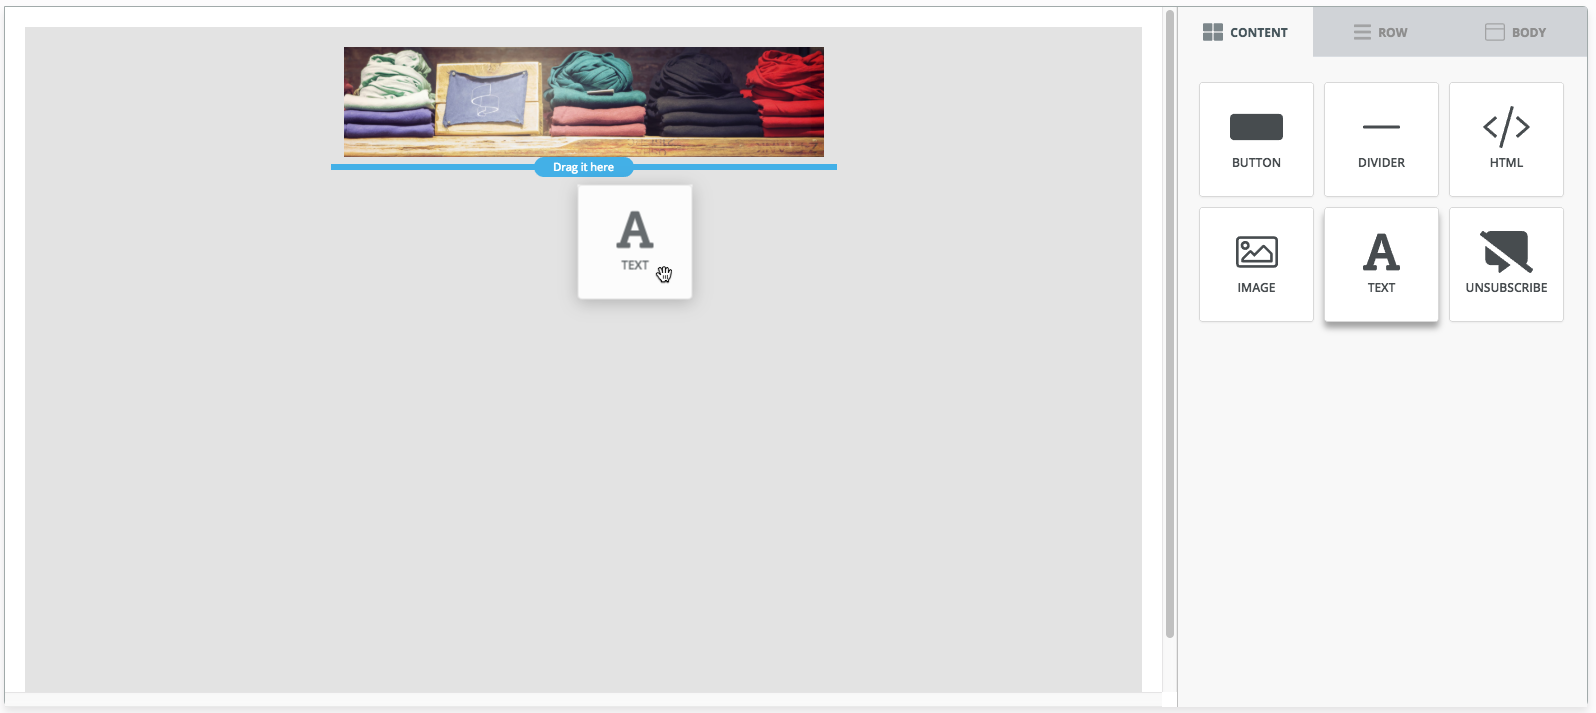
- Click on the newly-added text box to bring up its customization options on the right. This will also put a blinking cursor in the text box itself.
- Delete the placeholder text and replace it with the desired message. Note that you can format this message by changing the text's font, size, alignment, color, and you can bold, underline, or italicize for effect.
- Optionally, you can increase the space between this text box and other elements by increasing the Container Padding surrounding the text box.
- Click the Content tab to return to the list of elements.
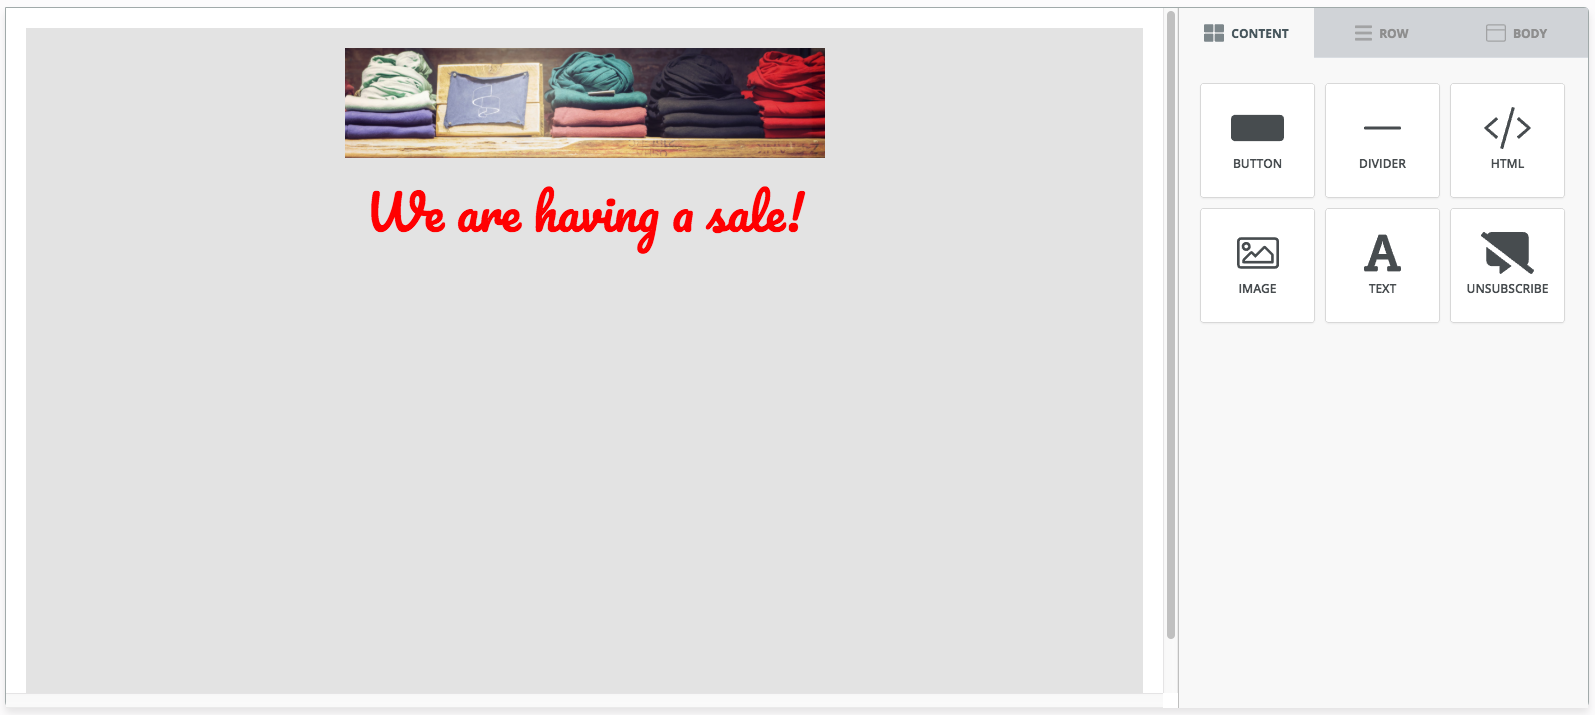
We're off to a good start, but the current banner and text will appear on a gray background and in a narrow center column. To change the background color and widen the body of the email:
- Click on the Body tab.
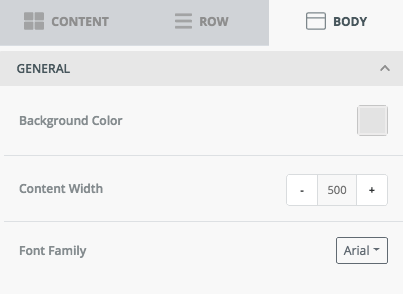
- Click on Background Color to select the desired color of the empty space in your email.
- Click on the Content Width value to change the value, or use the + and - buttons to gradually increment the width of the content.
- Click the Content tab to return to the list of elements.
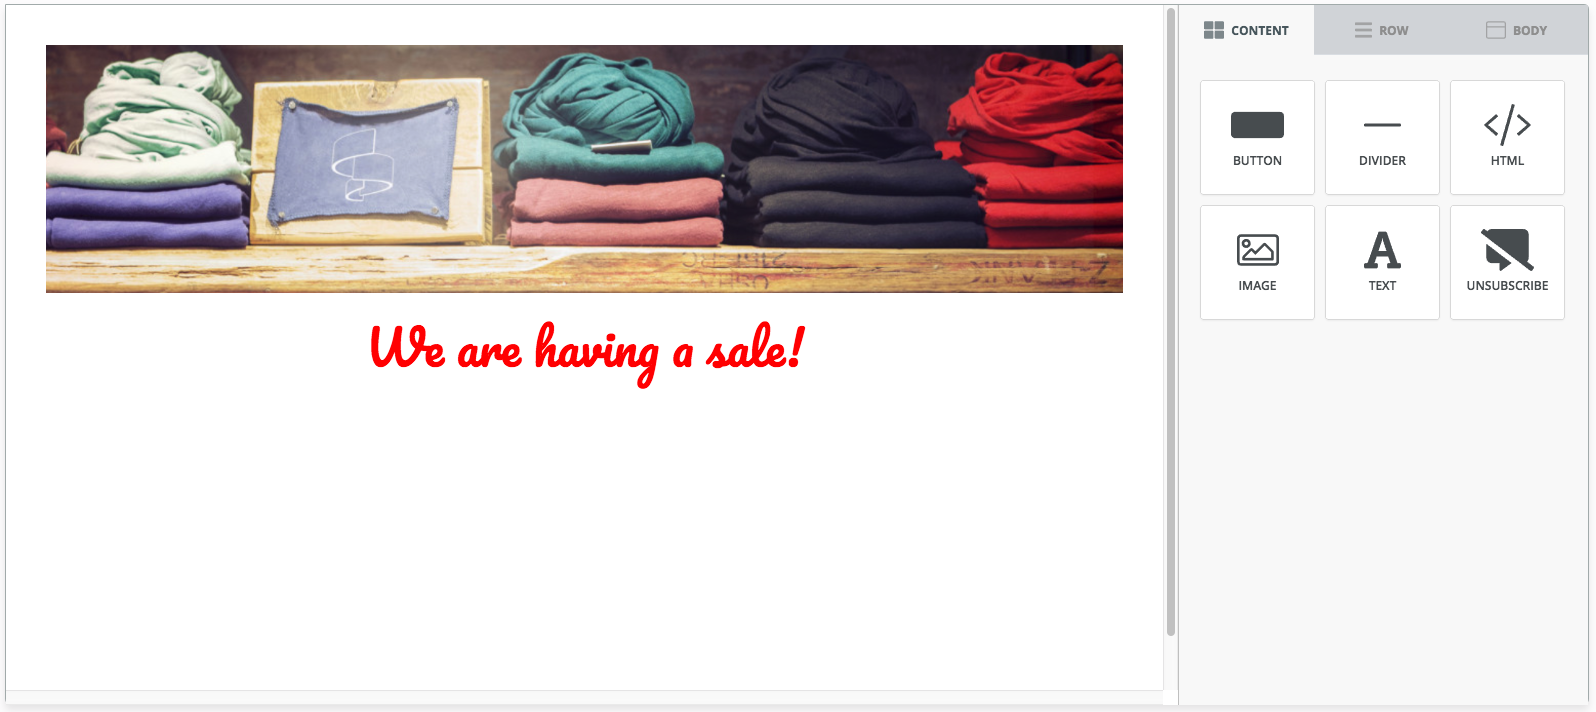
Now our wider email will fill more of the reader's screen.
Next, let's add some buttons to take the reader to the list of products on sale at each of our locations. We want these buttons to appear on either side of a block of text, so we'll need to be able to fit 3 elements side by side.
- Click the Row tab.
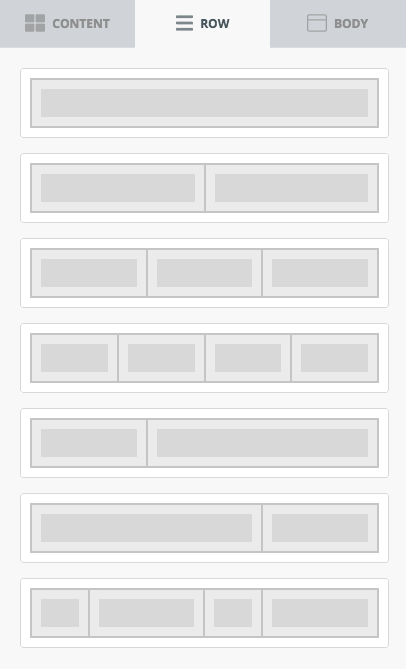
- Click and drag the row representing 3 element blocks side by side and drop it below our existing text box.
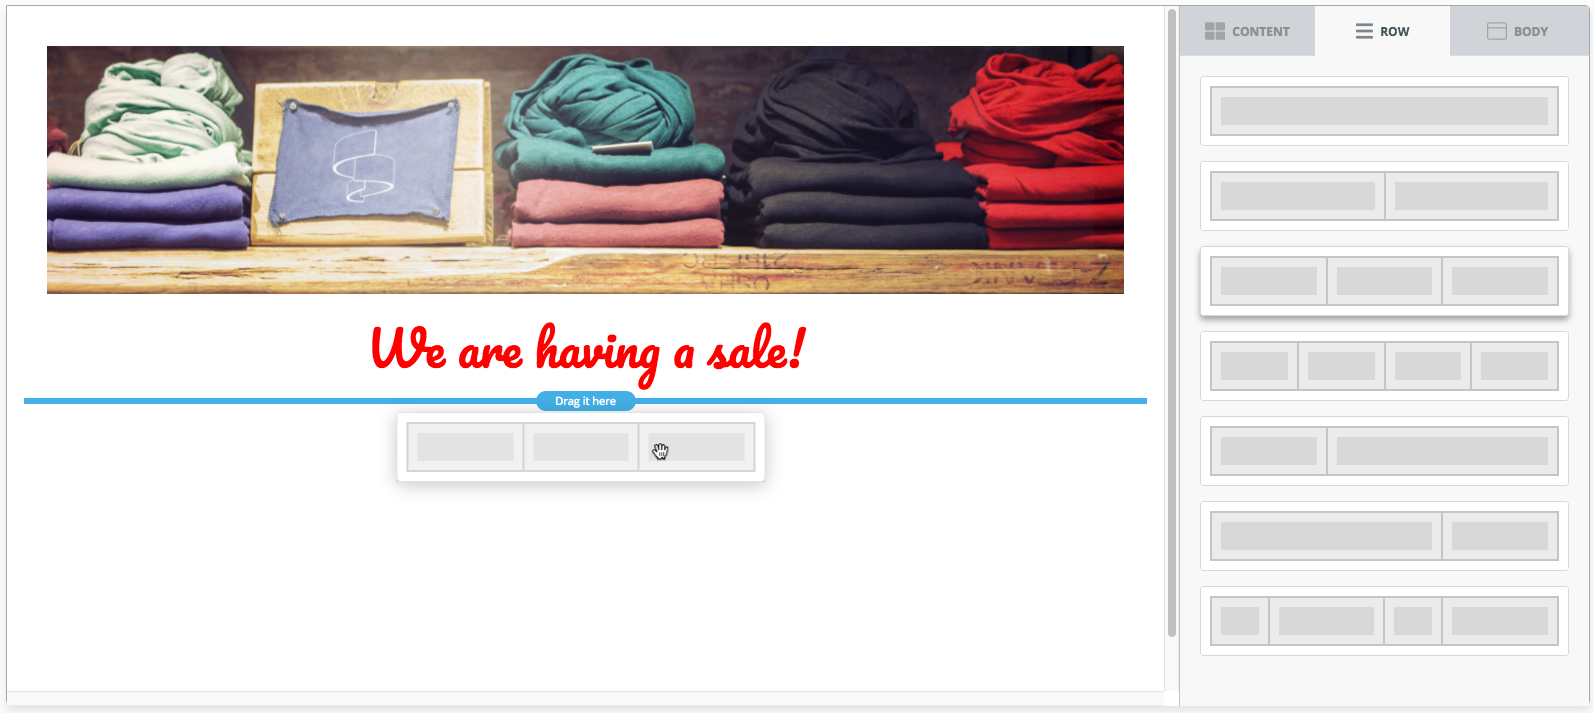
- We can now drop 3 elements on the same horizontal row. Click and drag a Button element to the left block, a Text element to the middle block, and another Button element to the right block. Note that the 3 elements are spaced evenly apart automatically.
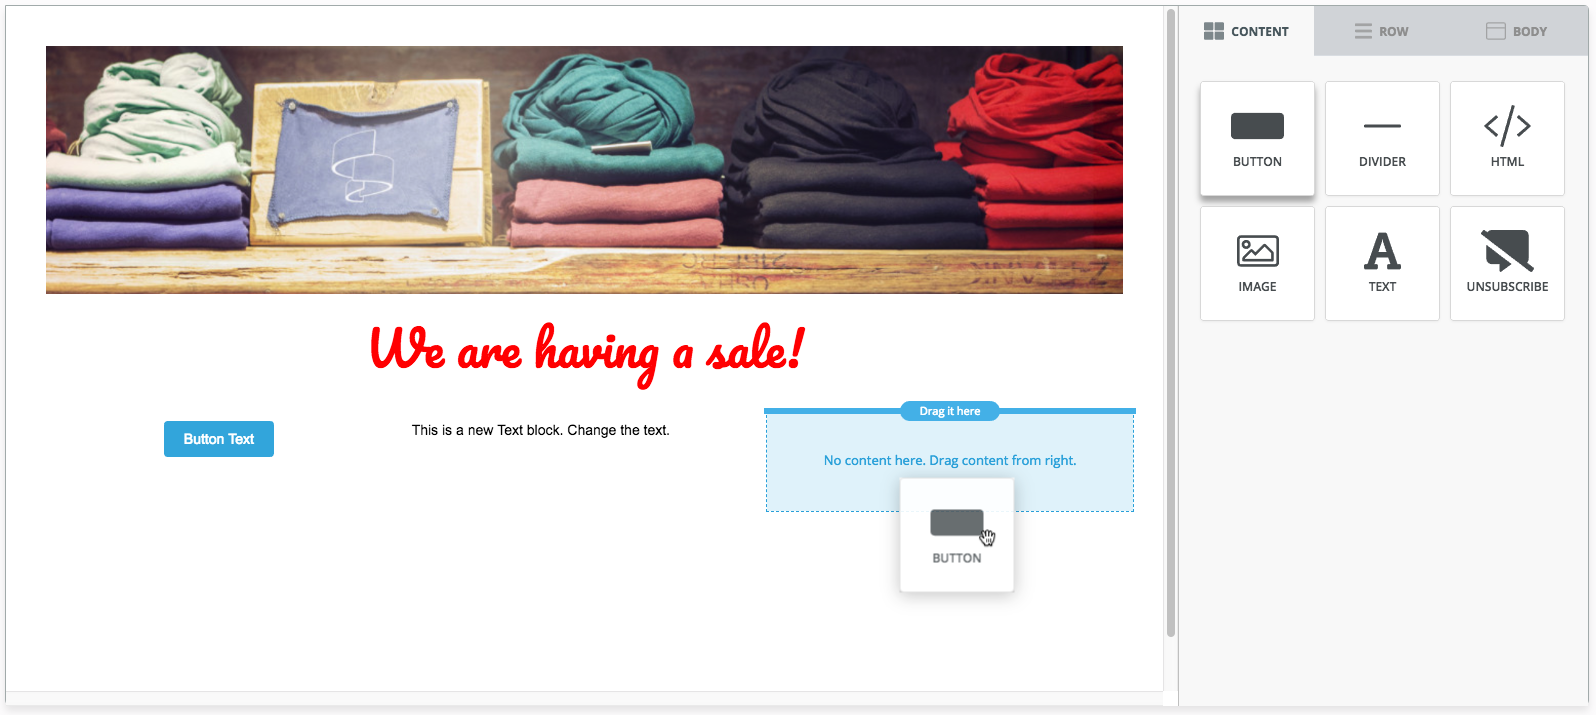
- Click on the left button to bring up its customization options on the right.
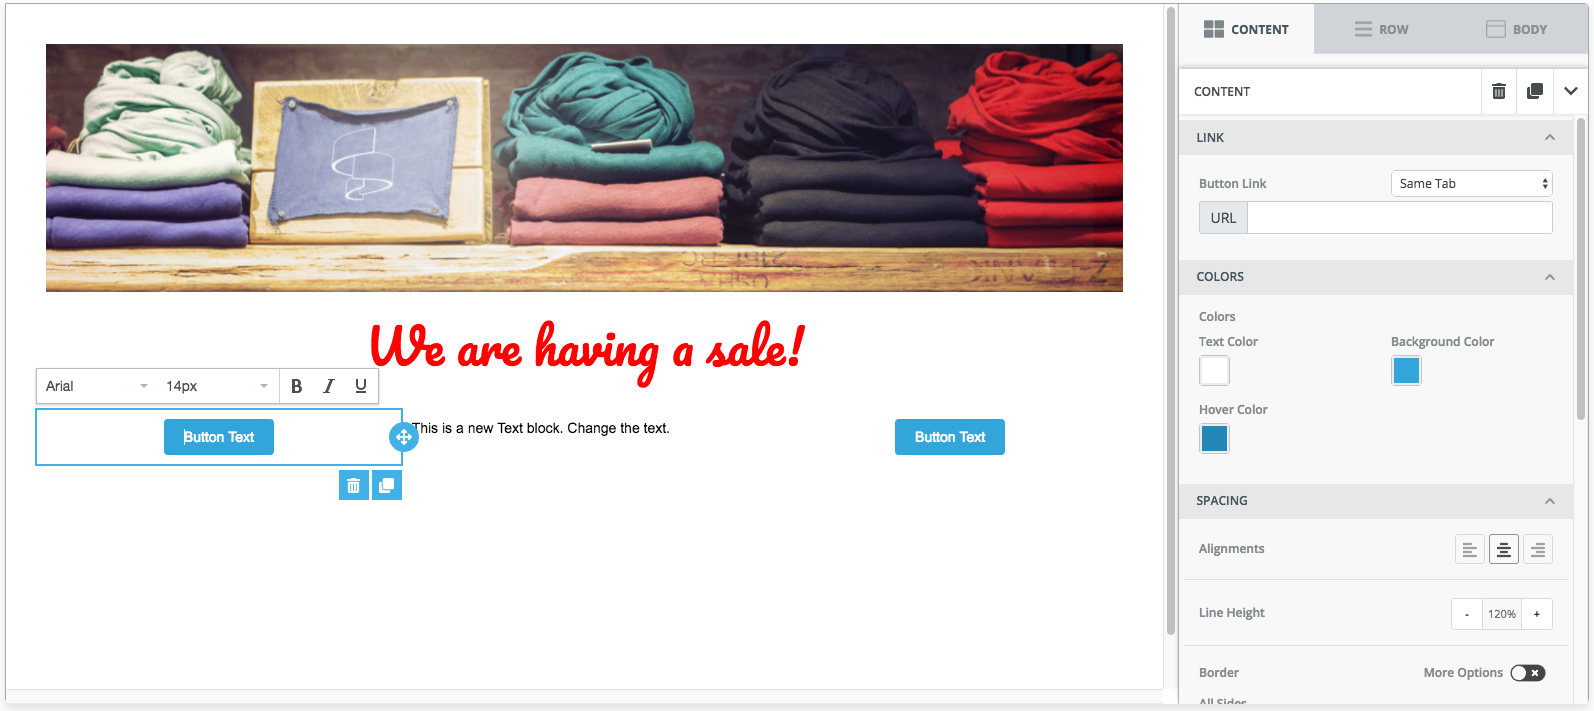
- Change the text on the button to describe its destination.
- On the right, enter the desired URL into the Button Link field. Use the drop-down menu to determine whether the URL will open in a new tab or the same tab.
- Optionally, you can change:
- The button's colors (background and text).
- The alignment of the button (left, center, or right).
- The thickness, style, and color of the border surrounding the button (the border can be customized for each side of the button if desired by clicking More Options).
- How square or round the button is by changing the Rounded Border value.
- The size of the padding surrounding the button.
When the button has been customized to your liking, you can customize the other button and the text block between them. If you want both buttons to look similar, you can speed things up by copying the already-customized button:
- Click the second button to highlight it.
- Click the
 button to delete the element.
 - Click on the completed button to highlight it.
- Click the
 button to duplicate the element.
 - Click and hold the
 button on the duplicate to drag and drop it into place.
 - Highlight the new duplicate and make any desired changes.
With that, we have a simple template completed and ready to send to our customers!
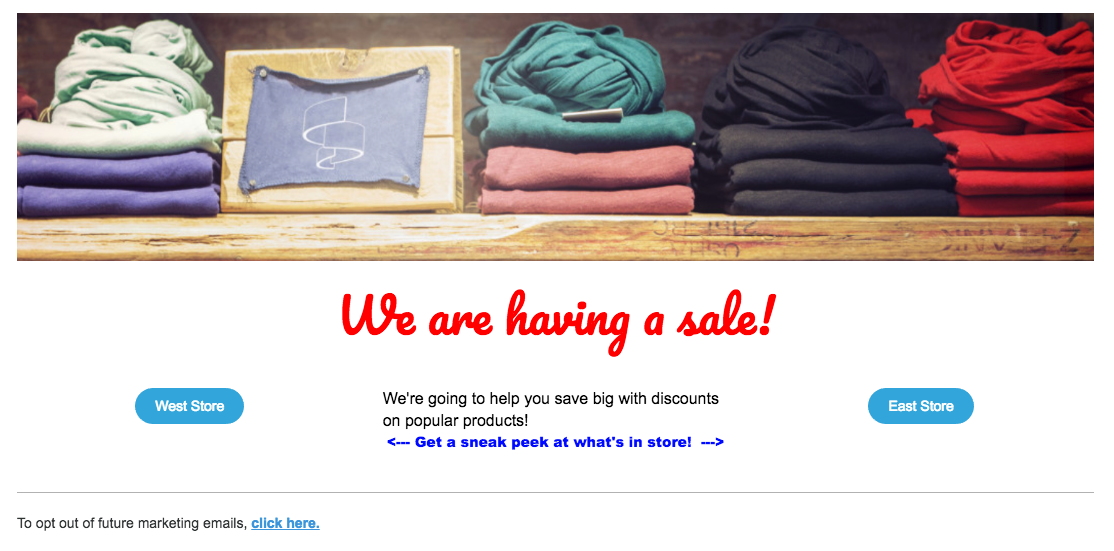
Click Next to review the parameters of the email and send it immediately, or click Save to return to this email another time; you'll find it under the My Emails tab.