Custom menu buttons allow you to work efficiently by creating shortcuts to submenus, categories, products, integrations, and more. They can be added to any of the register and work order tabs.
Multiple default custom menu buttons may have already been added for you, but you can add more as necessary.

Select from one of the register tabs to work in and you'll see the following fields to add a new button to the menu:
- Title: What the button will be labeled.
- Type: Select the function of the button from the dropdown menu, described below.
- Color: Select a color for the button.
- Sort Order: Adjusting this number changes the button order. The lower numbers begin from the top left of the menu closest to the product search bar.

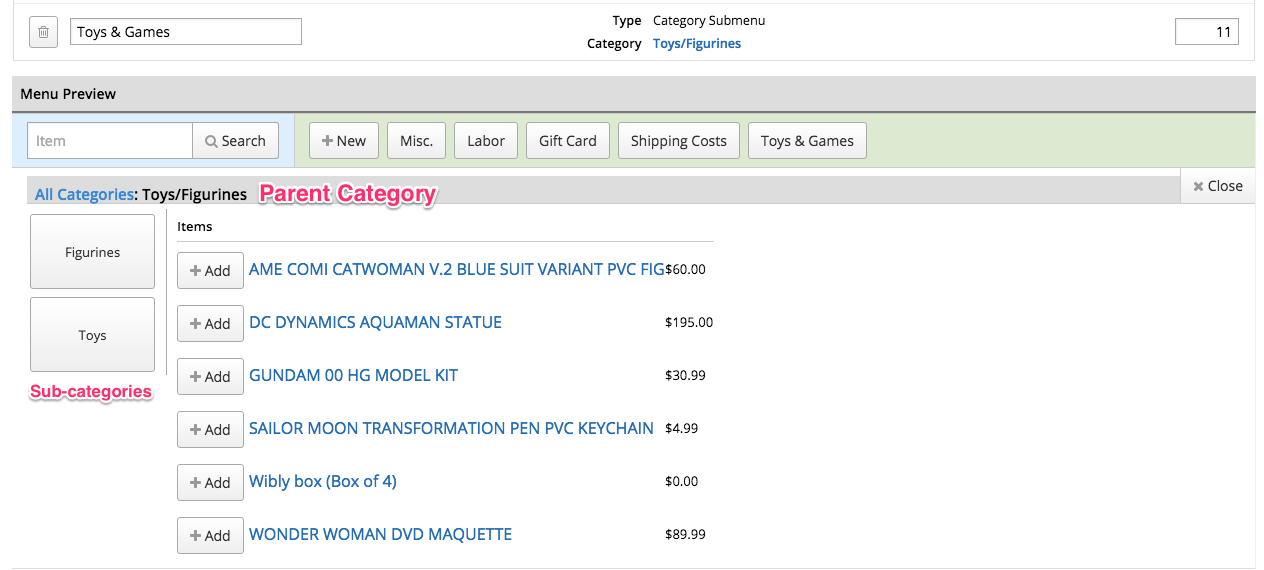
A functional preview of the menu is included at the bottom of the page. This helps you visualize and test any changes made.
Submenu
You can create a separate submenu and then create a button to access it quickly when adding a Submenu menu button. When a submenu button is selected, you will be presented with the custom menu buttons you've added within that submenu.
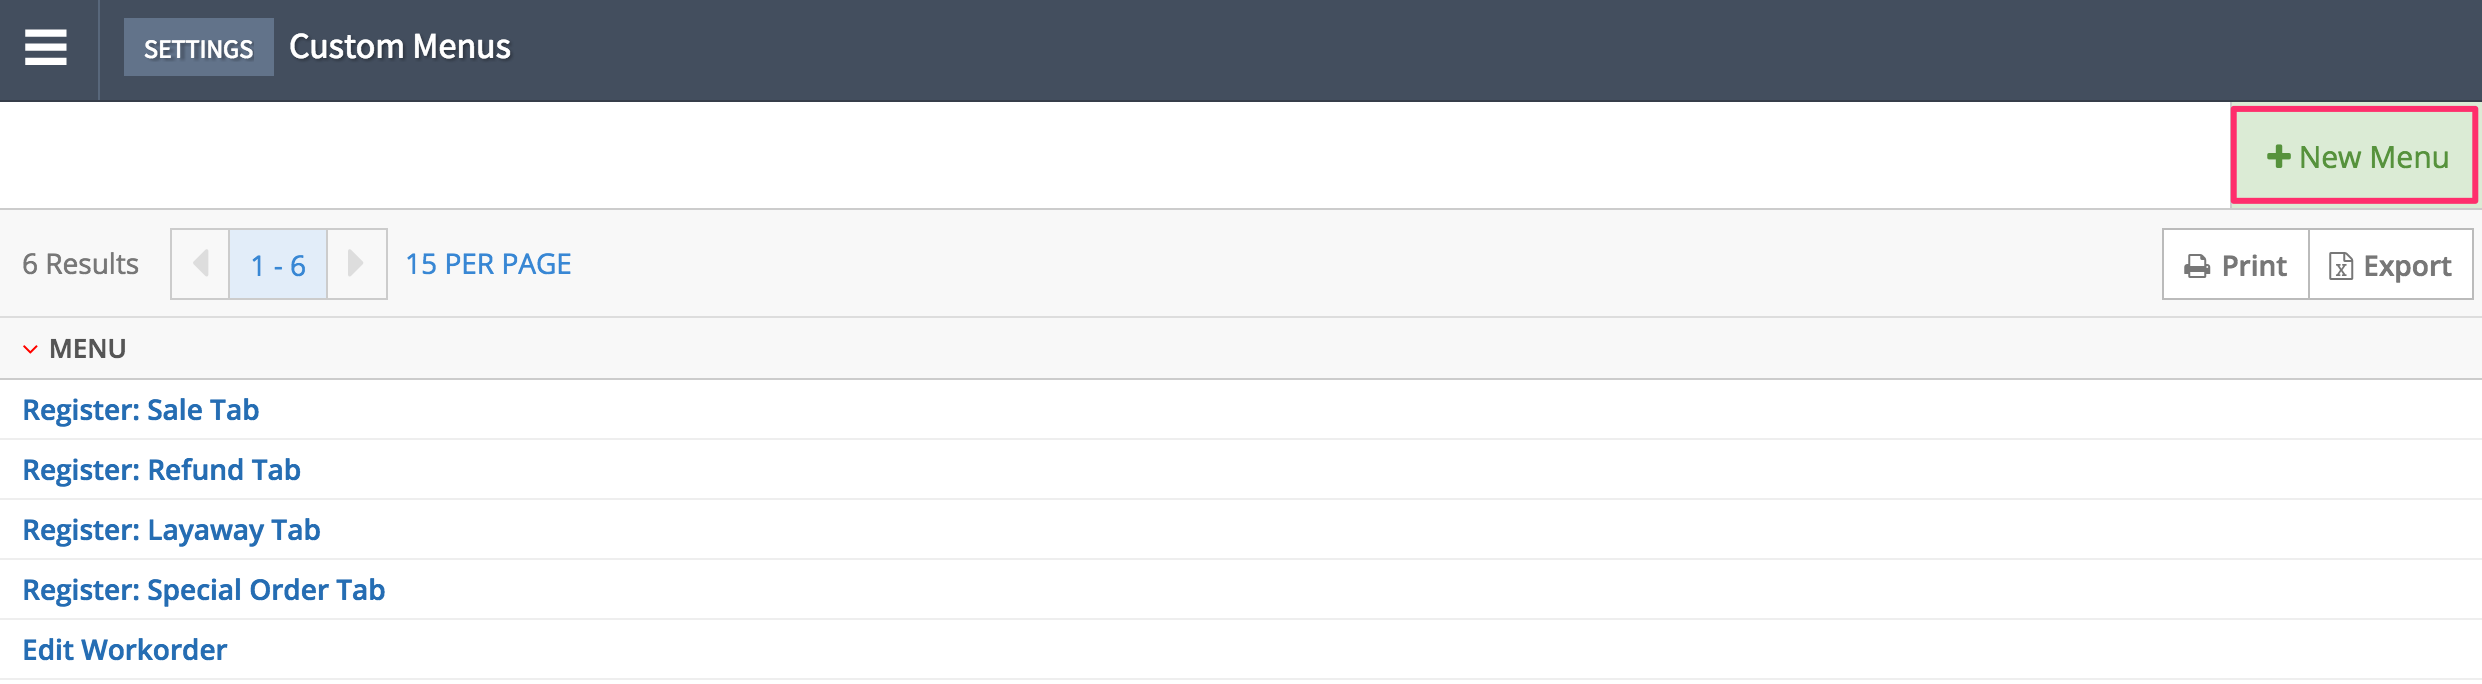
To create a new sub‑menu, navigate to Settings > Custom Menus and click +New Menu. Then, select the menu that you want to add a custom menu button to. Click the pencil button below the sub‑menu type and select the submenu you created.
You can group multiple custom menu buttons into a single submenu by creating a submenu button for each, accordingly.
Category submenu
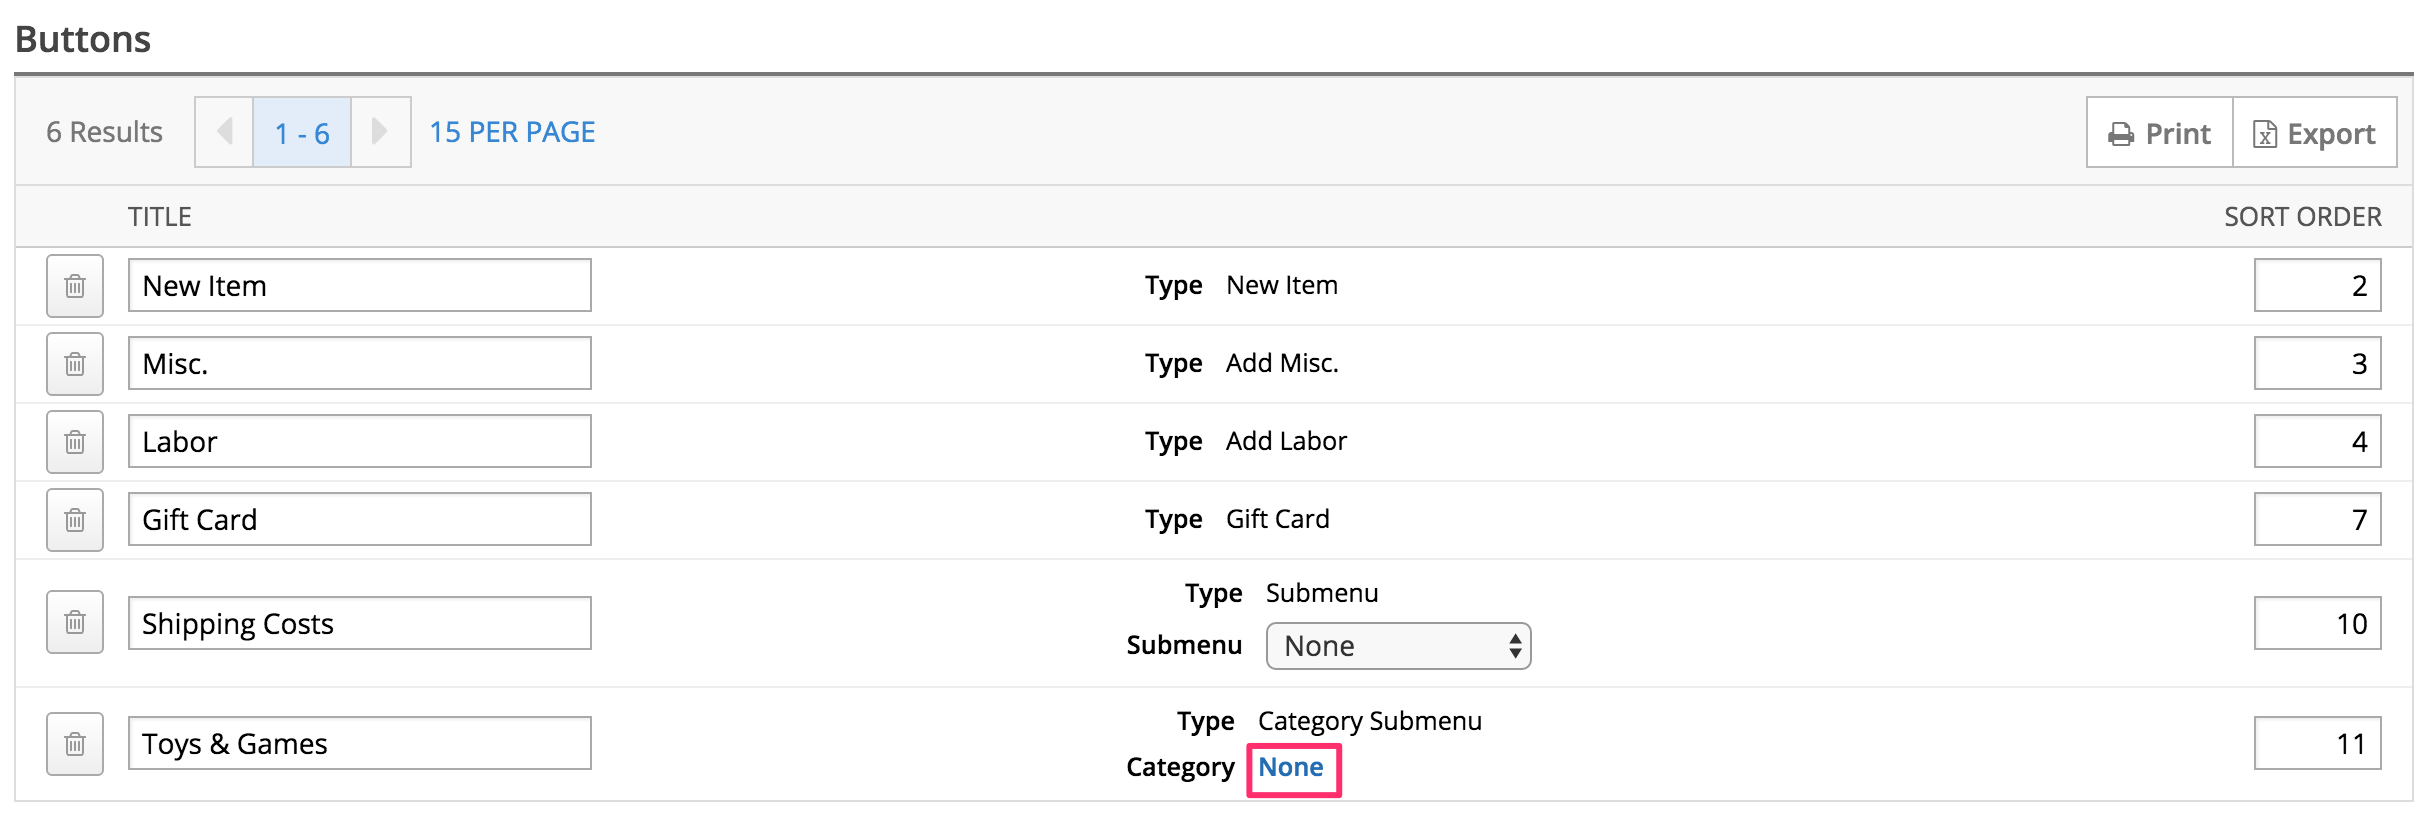
After adding a category submenu button, click None. Select the category that you want the custom menu button to be a shortcut to.
This button type is often used as a shortcut to popular item categories.
Add item(s)
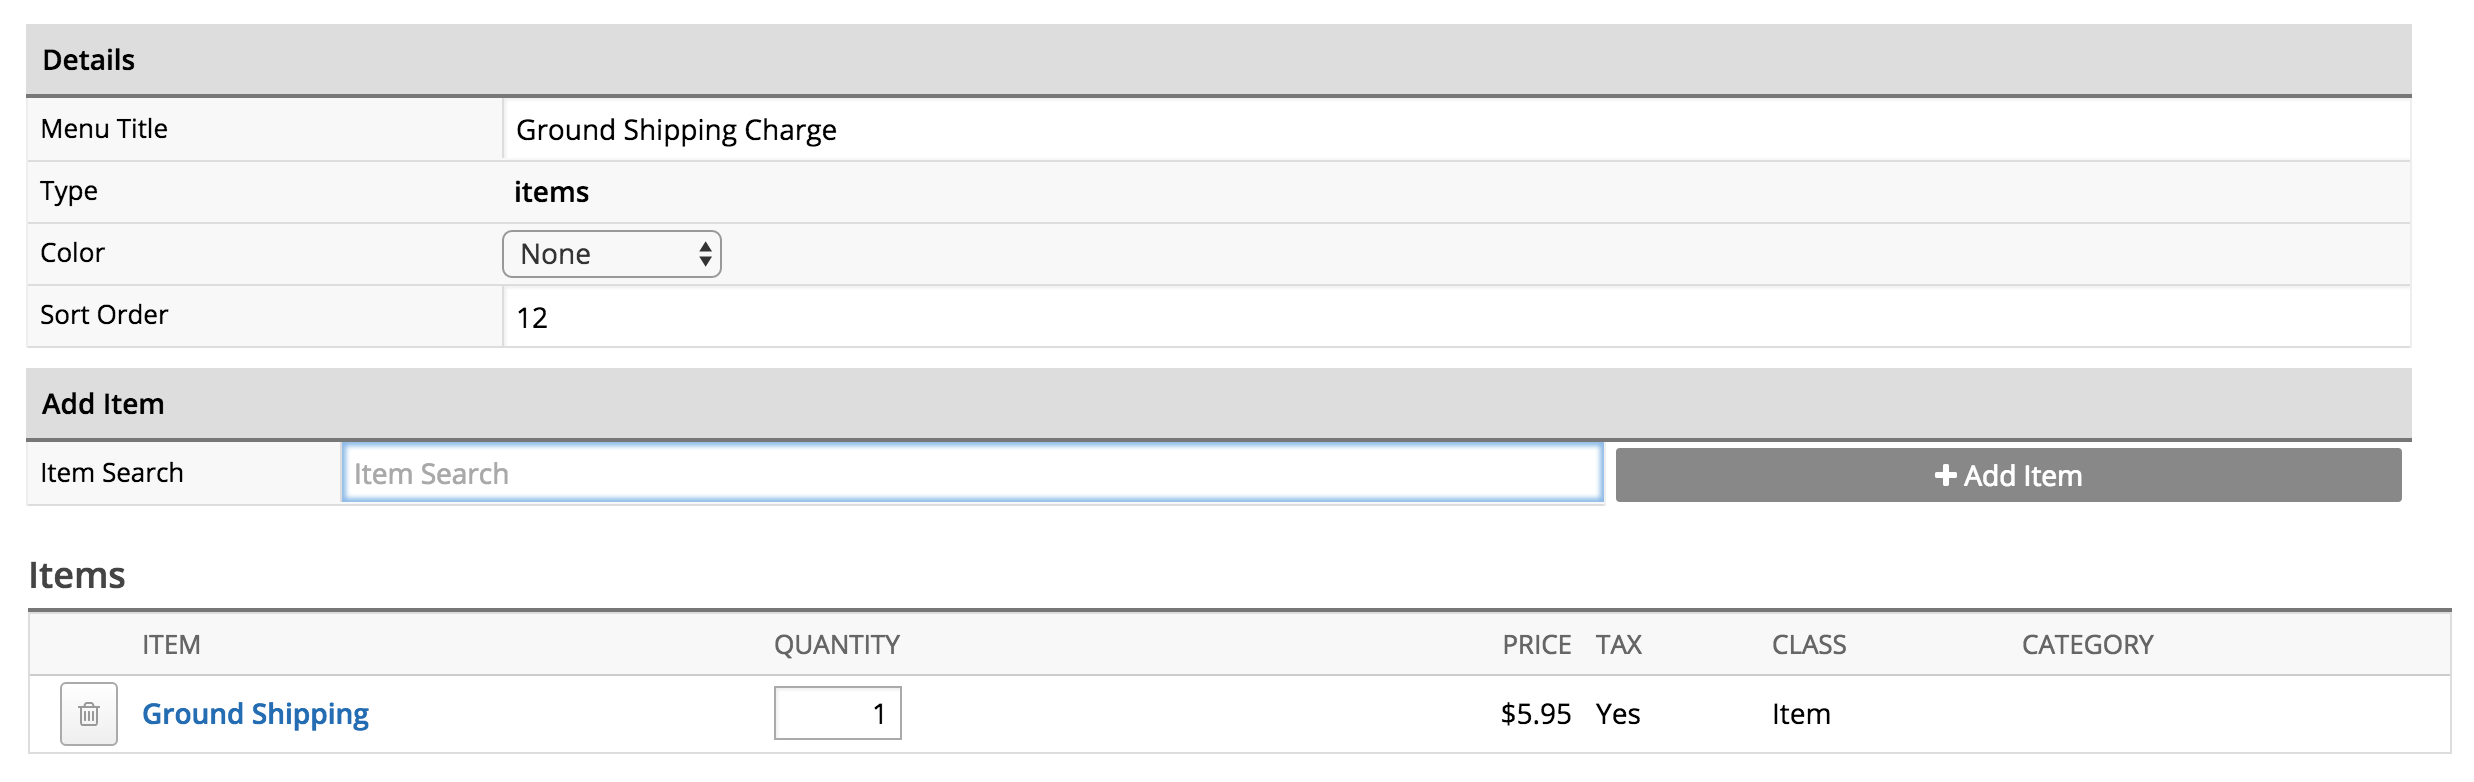
This button adds all of the items you've assigned to it. To assign one or more items to this button, click on the pencil icon to the left of its description and use the Item Search field to add items to it.
After adding a menu button of this type, click the pencil edit button next to its name. Then, use the item search to add items to the button.
This button type is commonly used to add frequently sold items or services without searching.

New item
This button will allow you to create a new item from within the register that will be saved to your inventory.
This button type is commonly used to create special order items from the register screen when the item is not in your local inventory.
Add misc.
Clicking this button will add a one-time charge to a sale. You can adjust the item's name, price, and cost from the register. The created product will not be saved to your inventory after finalizing the sale.
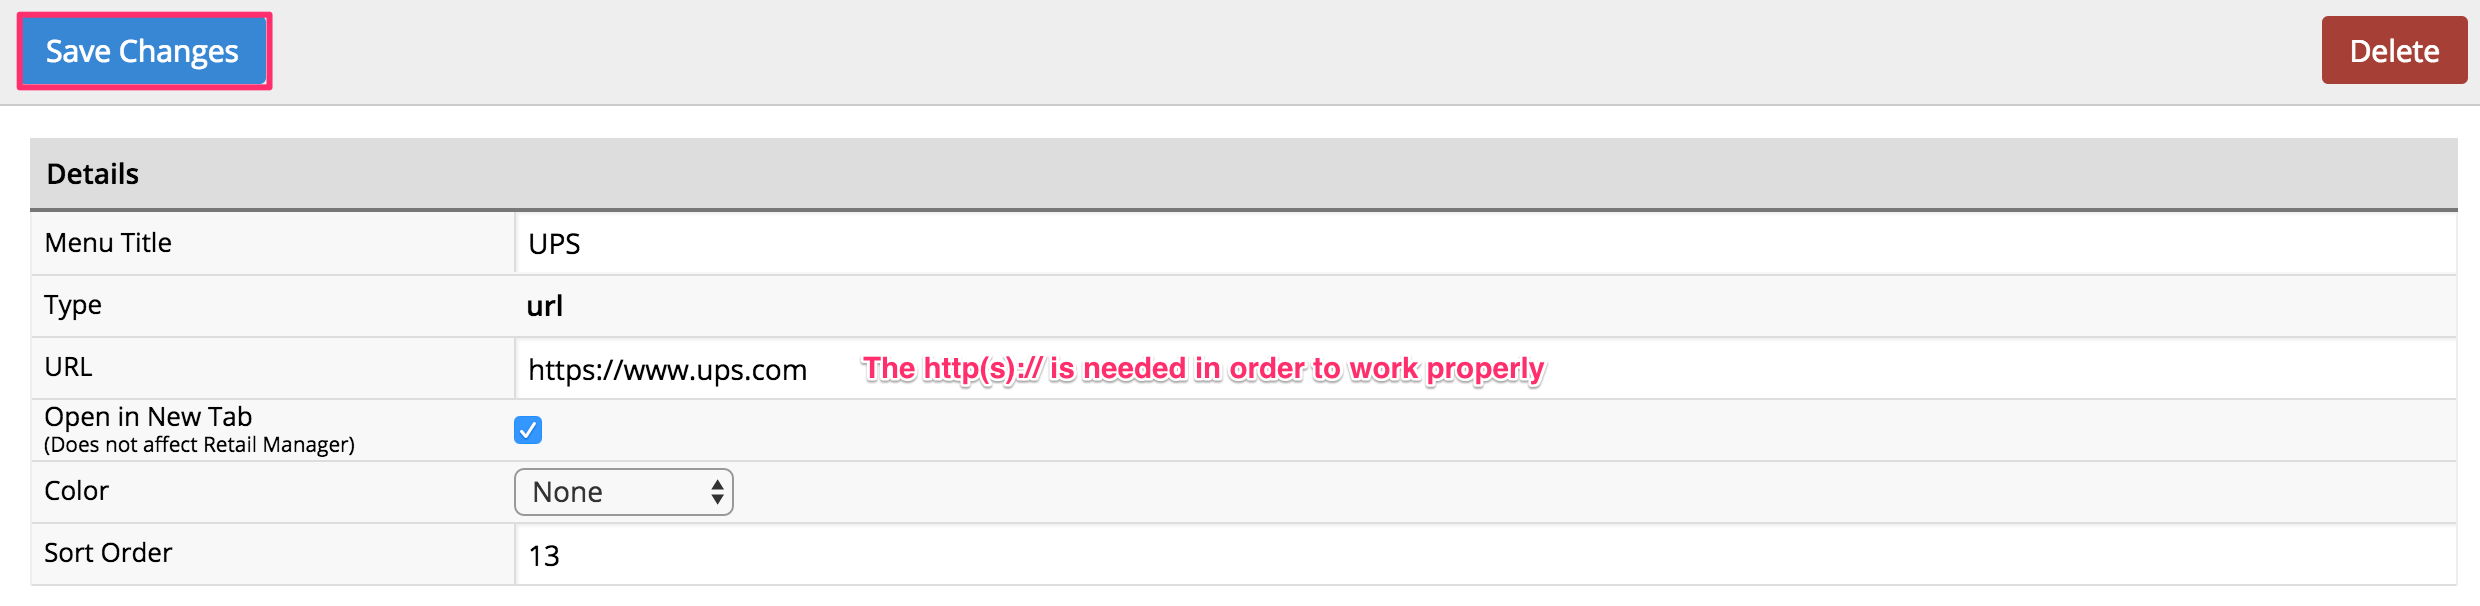
Open webpage
This button acts as a web link, bringing you to the web address you've set for it. Click on the pencil to the left of its description to adjust the URL.
This button type is commonly used to access customer loyalty websites or integrations from other Lightspeed products.
Any custom menu buttons of this type should not be adjusted, if they were created for you.
Integrators can find more detailed information on the query parameters sent to this URL in our developer documentation.
Add labor
This is similar to the Add Misc. button type, but for a one-time labor charge. You can adjust the labor charge's name, charge, and cost amounts.
Gift card
Clicking this button brings you to a screen to activate or recharge a Lightspeed Gift Card.