Now that you've set up your hardware, make a sale to test if your desktop bundle is working as it should. Afterwards, void the sale to remove it from your reports. We recommend doing this at the start of every business day before you open your store to customers.
Make a test sale
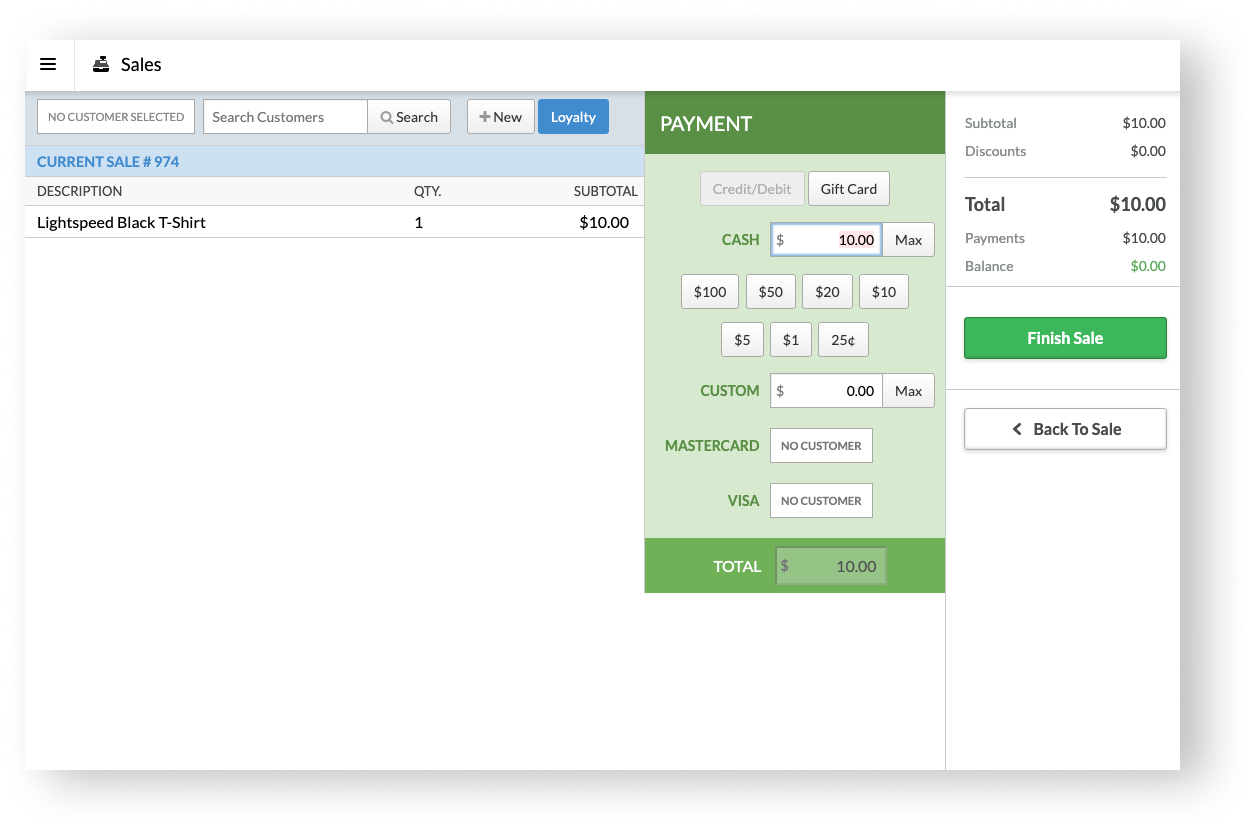
- In Retail POS, select Sales > New Sale.
- Scan an item that you have in your inventory. If you don't have an item in your inventory, create one on the fly. To do so, select +New. Then, enter a description (name), a default price and scan the item's barcode into one of the IDs fields. Finally, select Add to Sale. To be absolutely sure your barcode scanner is working, scan the item again after creating it.
- Select Payment.
- Next to Cash, select Max.
- Select Finish Sale.

You should now be able to scan items, print receipts and have your cash drawer open when a receipt is printed. Congratulations—you've successfully set up your desktop bundle!
Void a test sale
Voiding a test sale is straightforward, but you need certain employee permissions as it involves accessing reports and it can't be reversed. If you don't have the permissions you need, you can simply ask a manager to void the test sale for you.
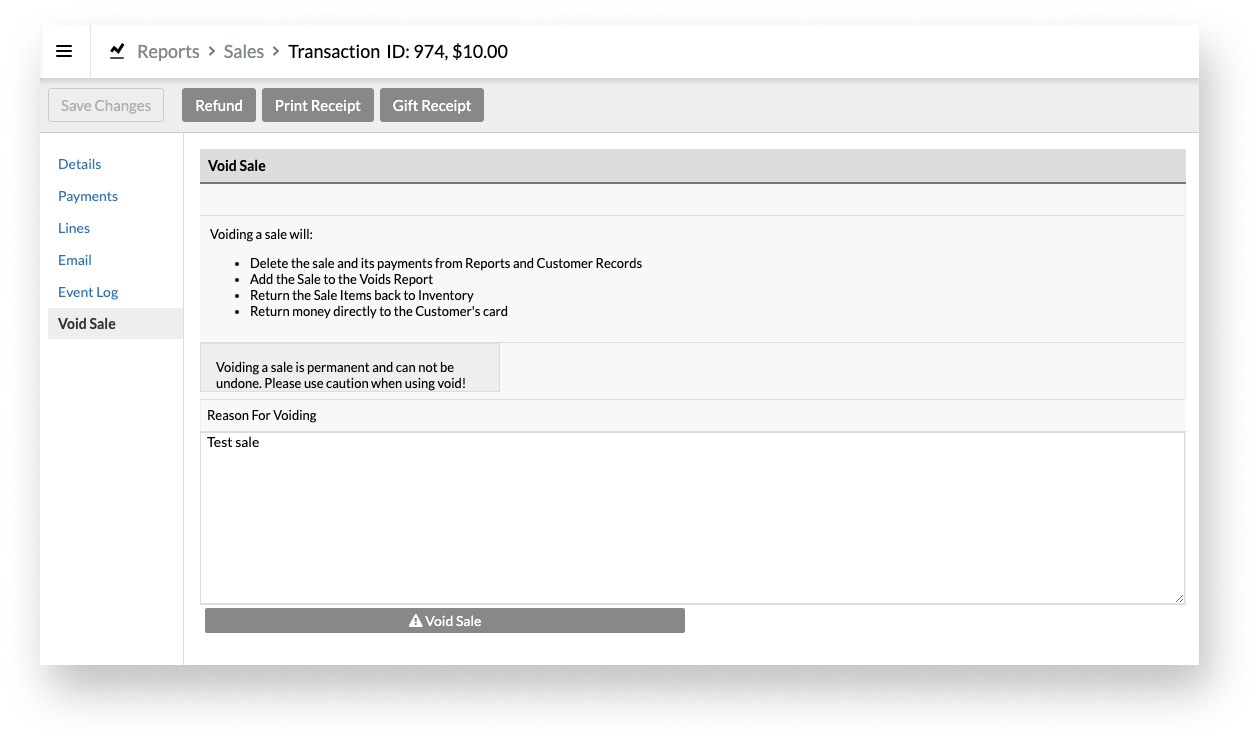
- In Retail POS, go Reports > Totals.
- Select the sale's ID.
- From the submenu, select Void Sale.
- Optionally, enter a reason for voiding (e.g. test sale).
- Select Void Sale.
